
New users can be added to the system, and appropriate permissions can be assigned to them by using different user groups. It is recommended to familiarize yourself with the rights of the user groups before adding new users so that you can immediately assign the necessary permissions to the user. You can read more about user groups in the guide User Groups.
The number of users allowed in the environment is linked to the plan in use:
Mini and Start – 3
Premium – unlimited
Office – 2 (in every environment)
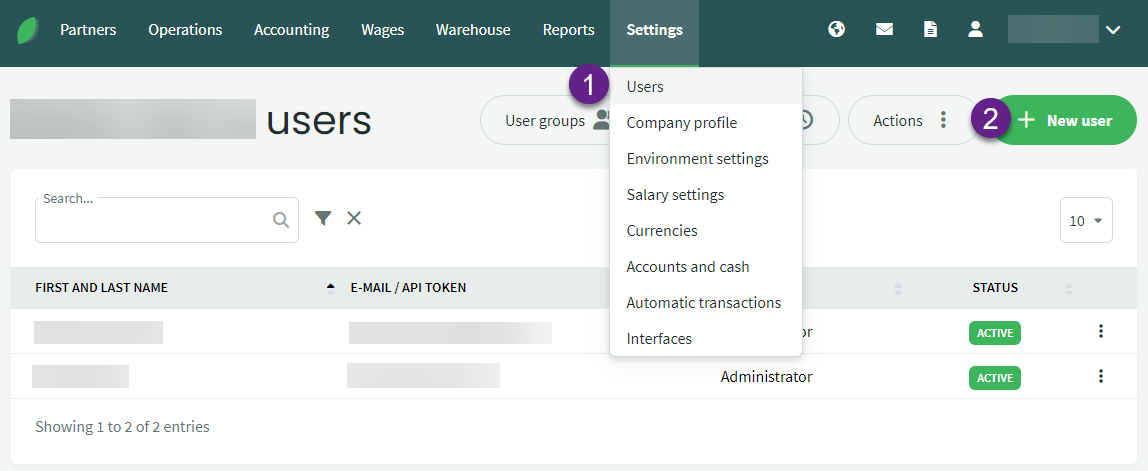
1. Select Settings -> Users from the menu
2. Click the green NEW USER button
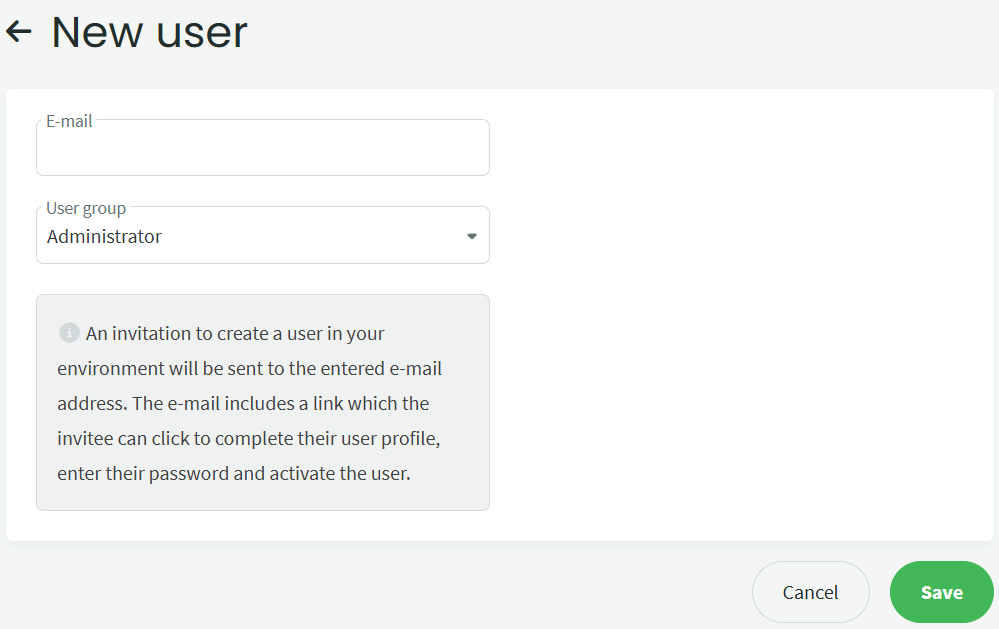
3. Enter the new user’s email address
4. Choose the appropriate user group
5. Click the green “Save” button
An email regarding the addition of the email address to the users’ list should have been sent to the new user’s inbox. The email contains a link that the user can click to complete the activation of their user account in the SimplBooks system. If the email has not been received, please check the email address and ask the new user to also check their spam folder.
If the user has been added to the system but has not yet accepted the invitation, their status will be “Invited.” For security reasons, the validity of the link in the invitation email is 7 days. If the user has not accepted the invitation within that time, the link will expire. The invitation can be resent by clicking the three dots next to the user and selecting “Resend invitation.”

You can also choose to delete the user from the same menu under the three dots.
To modify a user, click on the user’s row or choose the option from the three dots menu – you can modify the user’s group.
The user’s email address cannot be changed. If necessary, the new email should be added as a new user and the previous one deactivated or deleted.
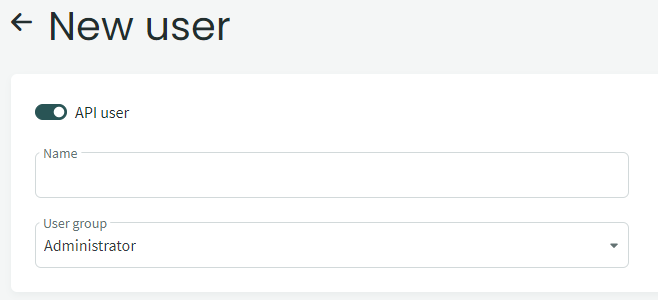
● API user – visible only with the Premium plan and required only for API users. API setup documentation for developers can be found here.
For additional questions, please contact us at support@simplbooks.ee.
Leave A Comment?