
Usually, you don’t need to record inventory income separately, as it is generated automatically when you enter purchase invoices for inventory items.
You can read about entering a purchase invoice for inventory items in the guide Entering a purchase invoice – warehouse items and an example of entering a sales invoice for inventory items can be found in section 9 of the guide Adding sales invoices (examples of transactions).
Adding an inventory income manually is mainly necessary when registering in-house production, where the materials used were initially recorded as expenses. In the inventory income transaction, the cost price of the product must be specified. This reduces the cost of goods sold (in the profit and loss statement) and increases the inventory account (in the balance sheet).
When using P&L statement scheme 1, labour costs cannot be included in the product’s cost price. This is possible when using P&L statement scheme 2, which is more suitable for production-oriented companies.
The choice of profit and loss statement format should be made when starting the business. It is not advisable to change it repeatedly, as consistency and comparability of data must be ensured.
Inventory income can be added in Inventory -> Documents -> New Document -> Inventory Income.
● General information panel
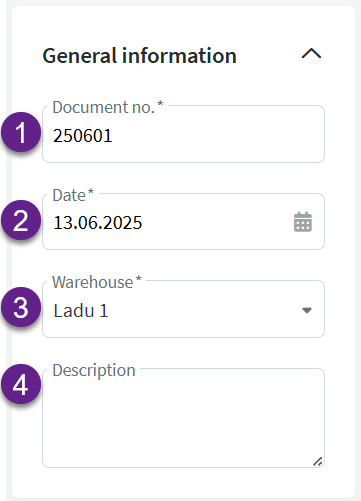
- Document no. – an automatically generated number combination created by the system. The numbering format can be changed under Settings -> Environment settings -> Inventory settings.
- Date – by default, the system suggests today’s date.
- Warehouse – the warehouse where the goods are received. Click on the field to select the appropriate warehouse. If the desired warehouse is not listed, it must first be added under Warehouse-> Warehouses.
- Description – this field is optional and can be left empty. You may enter any additional information related to the inventory income here.
● Document lines panel
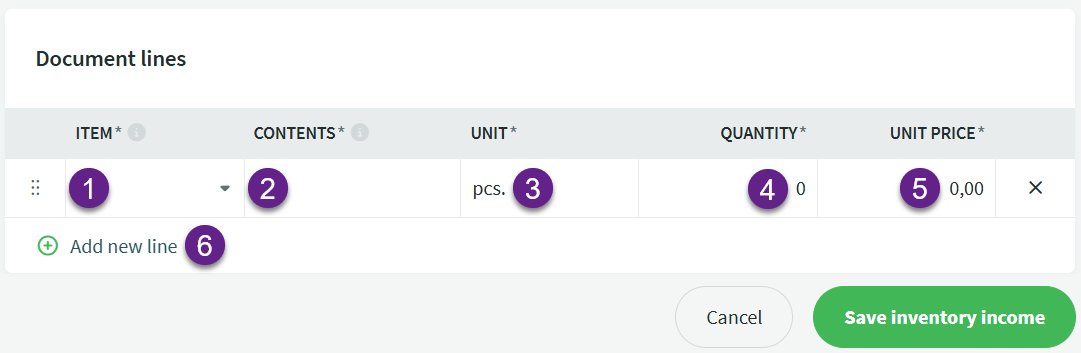
- Item – select the inventory item to be received. When you click on the field, the system will by default suggest the first 10 items from the list.
- Contents – the item name, taken from the item card.
- Unit – the unit of the received item (pcs, set, etc.).
- Quantity – the quantity of the item to be received.
- Unit Price – the price per unit.
- Add new line – use this if you want to receive several different items on the same document.
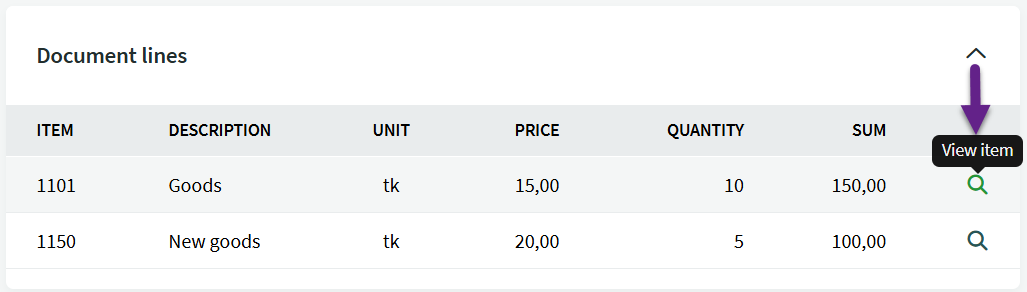
When saving the inventory receipt, the system displays the saved document lines with the total amount per line. Clicking the magnifying glass icon at the end of the line opens the detailed item card.
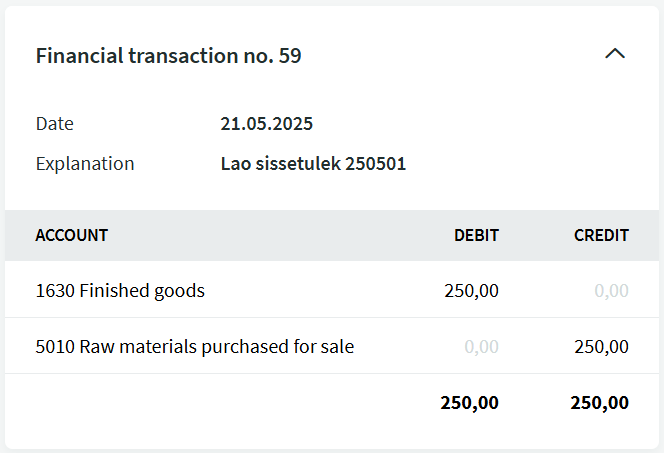
As a result of saving the inventory receipt, an accounting entry is created where the system credits expense account 5010 “Raw materials purchased for sale” and debits the selected inventory account.
If you have any additional questions, please write to us at support@simplbooks.ee
Leave A Comment?