
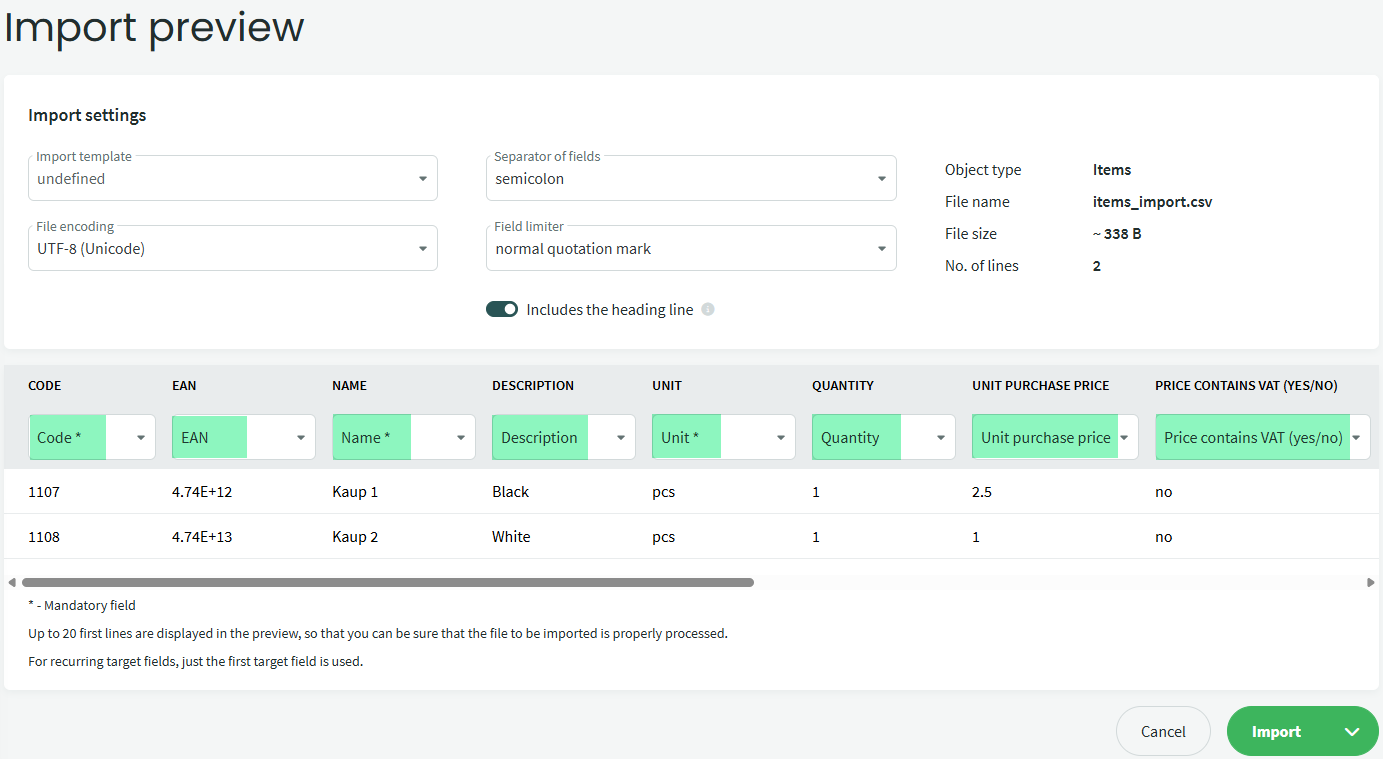
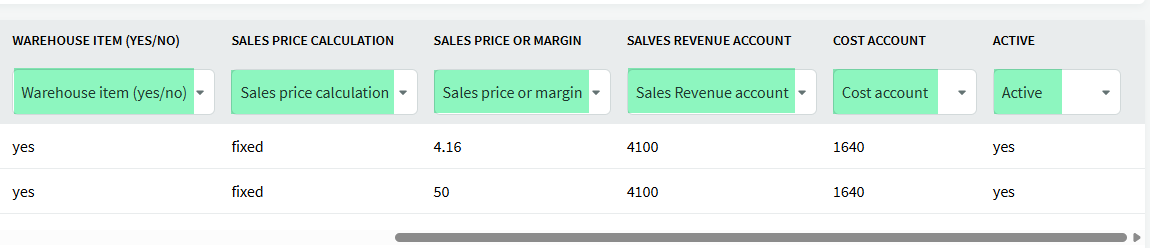
To import items into SimplBooks, you need to prepare a CSV file containing the necessary data. Below is a description of the fields that can be imported, including whether each field is required or optional.
After entering the required data into the file, save it using the “Save As” option and choose the format “CSV (Comma delimited) (*.csv).” Do not open the saved file before importing it into SimplBooks, as this may corrupt the formatting!
You can read more about items from this guide.
Important If item codes begin with zeros, it is very important to make sure that these zeros are preserved during the import process. As a best practice, we recommend avoiding leading zeros in item codes altogether. Tip An important tip for updating existing dataIf you need to update item data (VAT types, price), export the items to an Excel file (select “Document MS Excel” in the export options), make the necessary modifications, save it in CSV format and import it back.
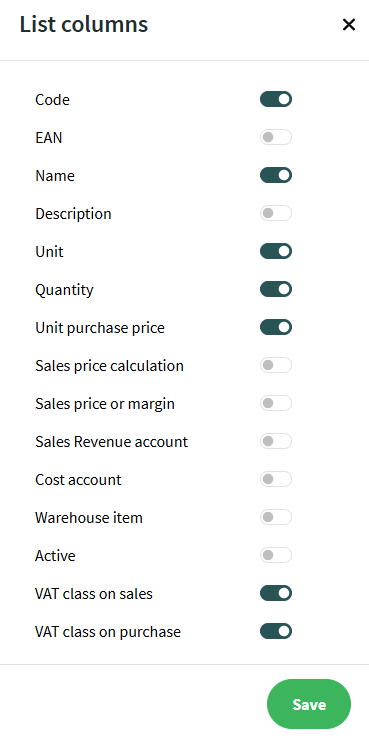
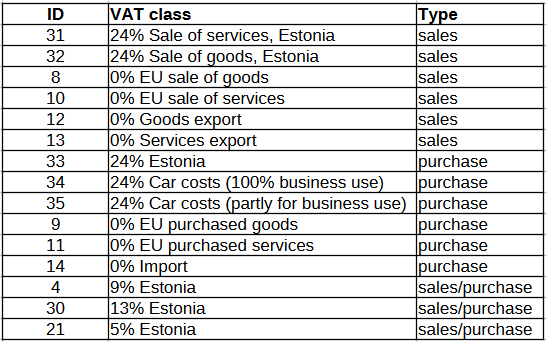
To ensure that the necessary data is updated, make the columns in the item list visible before exporting the file. You can configure the columns in the Actions menu -> List columns. Make the necessary selections and save. When exporting the file, select “Document MS Excel”. After making the necessary modifications, save it in CSV format (“Save As” and choose “CSV (Comma delimited) (*.csv)“). VAT class IDs can be viewed by opening the VAT type settings. If you have not added VAT classes yourself, the connection in your environment should be as follows: Select the file from your computer or drag it into the import window and click Import. Here you need to define the associations between the file columns and the program’s data fields. The connections are already selected in the picture. Until the connection is not selected, the text “Choose target field” will appear above the column. Once all the necessary connections are marked, click Import or Import and Save as template (if you know you will be importing articles in the future). At the end of the import, you will be informed about how many rows were imported and whether the import of all rows was successful. You can read the guide on importing the initial inventory here: Entering initial inventory. If you have any additional questions, please write to us at support@simplbooks.ee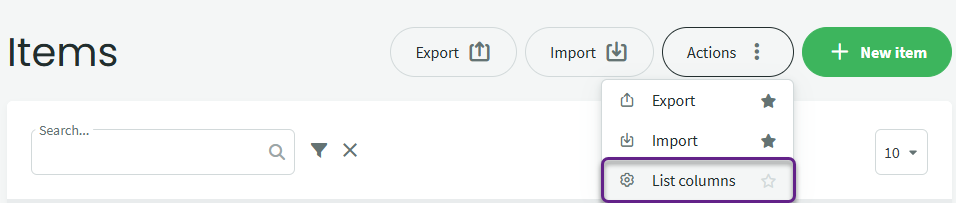
Go to Settings -> Environment settings -> VAT classes, select the VAT class and the last number in the browser’s address bar will be the VAT class ID.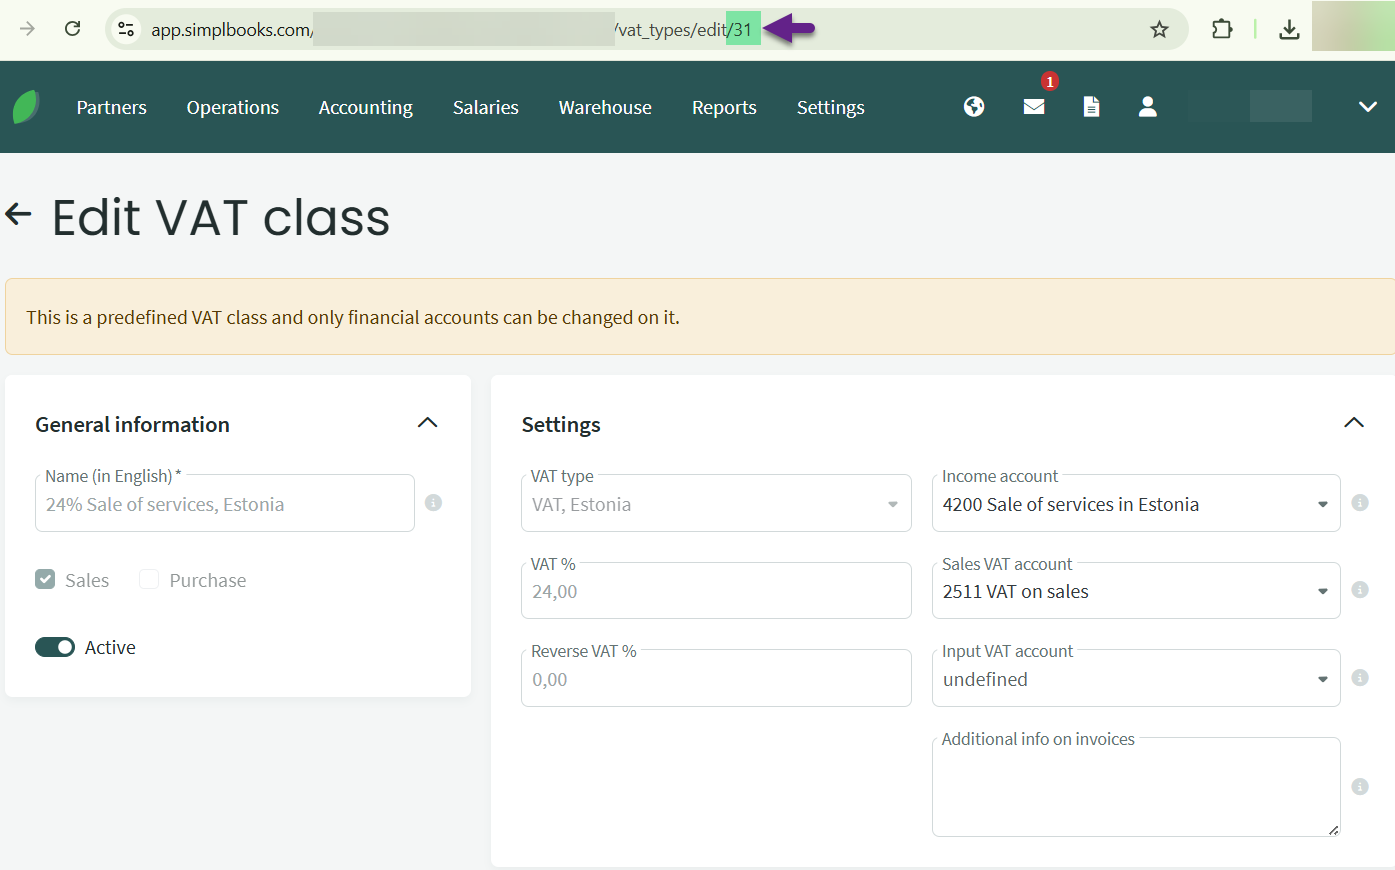

Leave A Comment?