
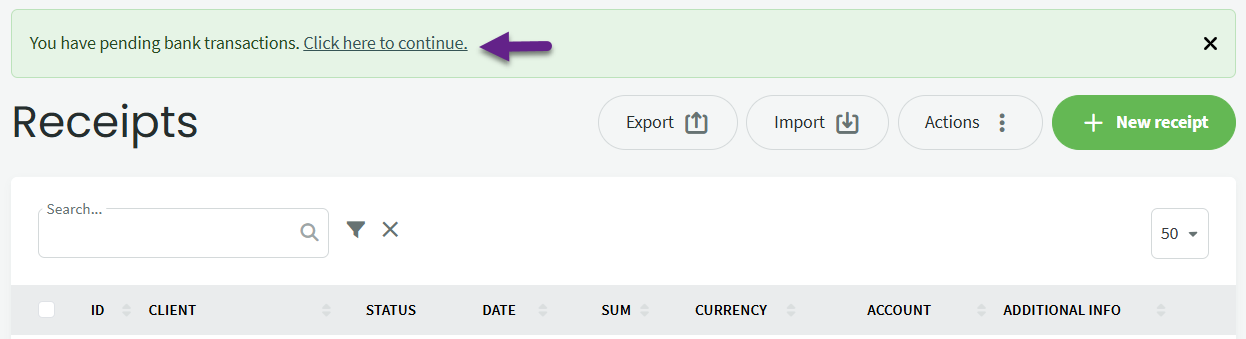
The Swedbank <-> SimplBooks integration automates the import of Swedbank transactions into SimplBooks. This means there is no longer a need to download transaction files from the bank and upload them to SimplBooks for saving bank transactions. Once the integration is activated, transactions from the previous day are imported automatically into SimplBooks overnight. Additionally, payment orders can be sent directly to the bank, where they need to be confirmed. Activating and using the integration does not incur any additional cost.
To activate the integration, your company must have a bank account with Swedbank. Once this condition is met, log in to your SimplBooks account, go to Settings -> Integrations and select “Swedbank” from the list.
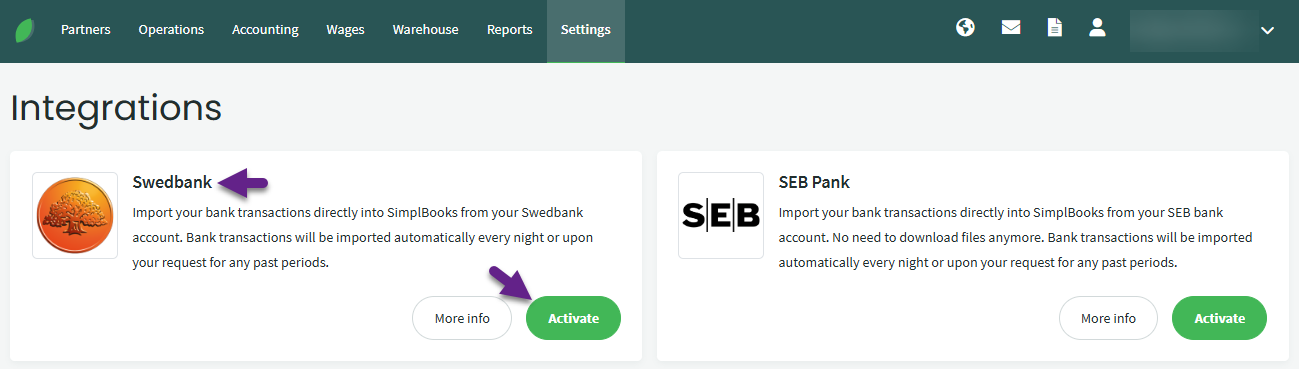
By clicking the “Activate” button, a view will open where you can verify the bank account and company registration code. Once the data is verified, click the “Activate” button again.
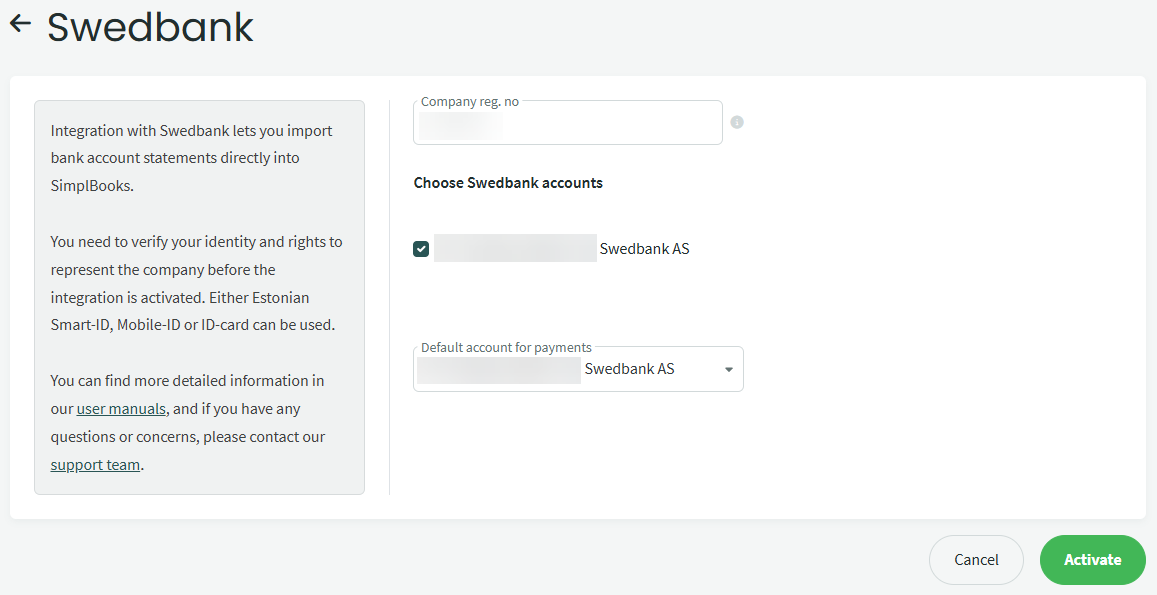
After this the system will ask you to authenticate yourself using Smart-ID, Mobile-ID or an ID card. The integration can only be activated by the company’s legal representative (board member). This ensures that data from your bank account is accessible only to the correct and authorized users.
Once authentication is successful, the contract initiation process will begin automatically. Next, the company board member must sign the contract in Swedbank’s corporate internet banking. Once the contract is signed, the service will be activated within one business day.

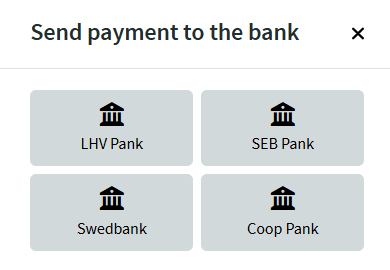
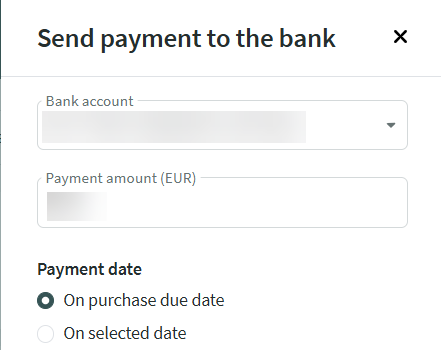

4 After selecting the bank, you can choose the payment date, either the due date listed on the purchase invoice or a date that you select.
Important Sent payments must be confirmed in the bank!
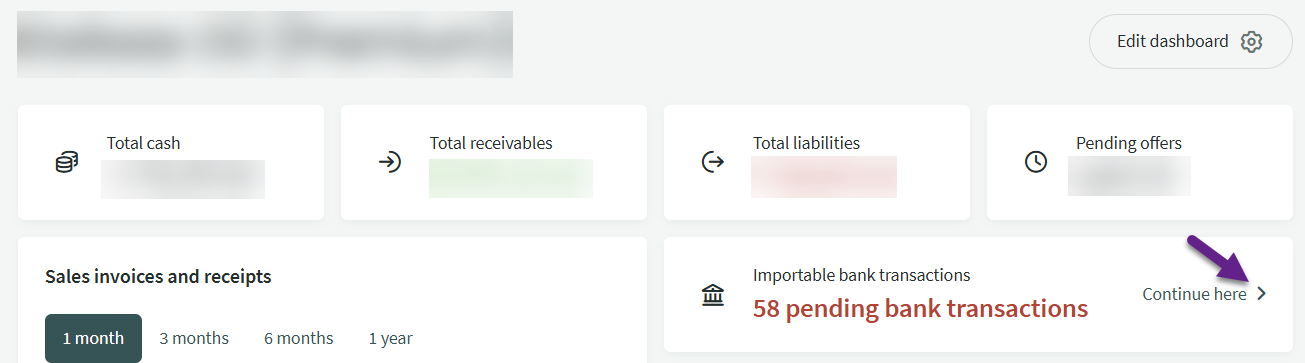
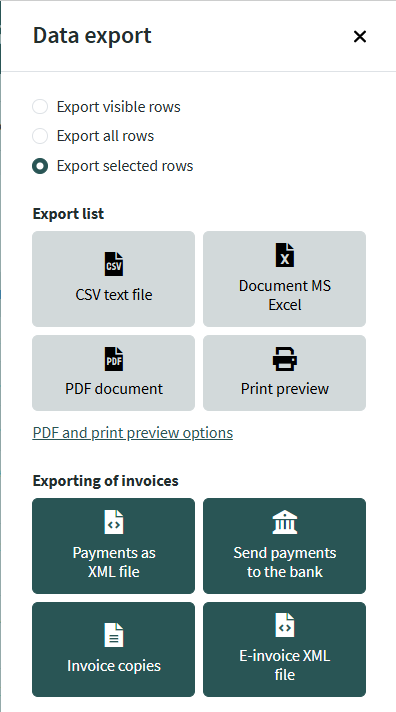
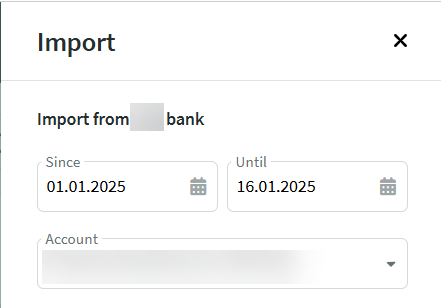
You can import transactions from the period before activating the integration by going to Operations -> Payments or Operations -> Receipts. Click the “Import” button and select the bank whose transactions you wish to import. Only the banks with which you have an integration will be displayed in this view.

The next step is selecting the period. You can import transactions up to 90 days old.
If it becomes necessary to remove the integration, two steps need to be followed. First, remove the integration under Integrations in the SimplBooks environment and secondly, terminate the contract with the bank.
If you have any additional questions, write to us at support@simplbooks.ee
Leave A Comment?