
Settings -> Environment settings -> VAT classes
VAT classes are preconfigured by us for the most common situations. You can also add additional classes yourself based on your company’s specific needs.
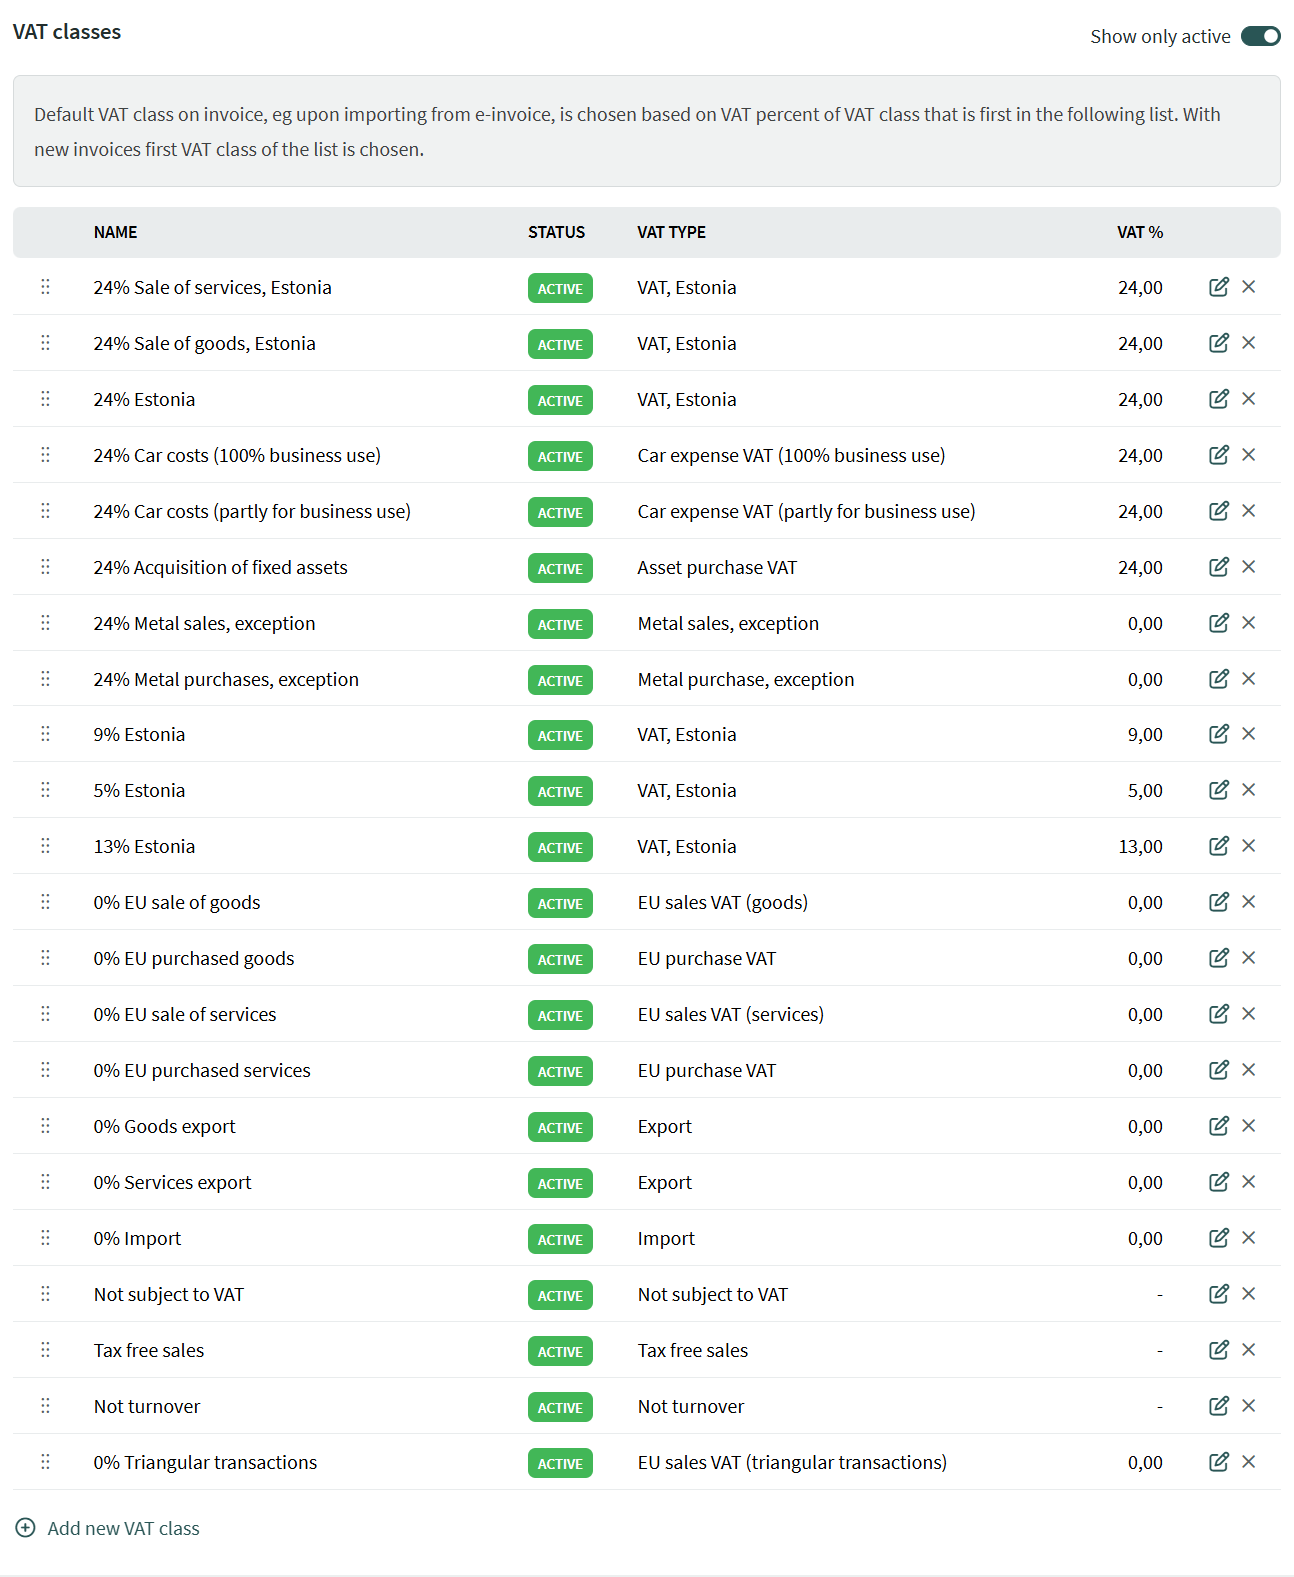
By clicking the pencil ![]() icon, you can modify the settings of VAT classes. For preconfigured classes, you can only change the financial accounts.
icon, you can modify the settings of VAT classes. For preconfigured classes, you can only change the financial accounts.
You can change the order of VAT classes by grabbing the “dots” on the left side of the row and dragging them to the desired position.
Adding a new VAT class and its settings
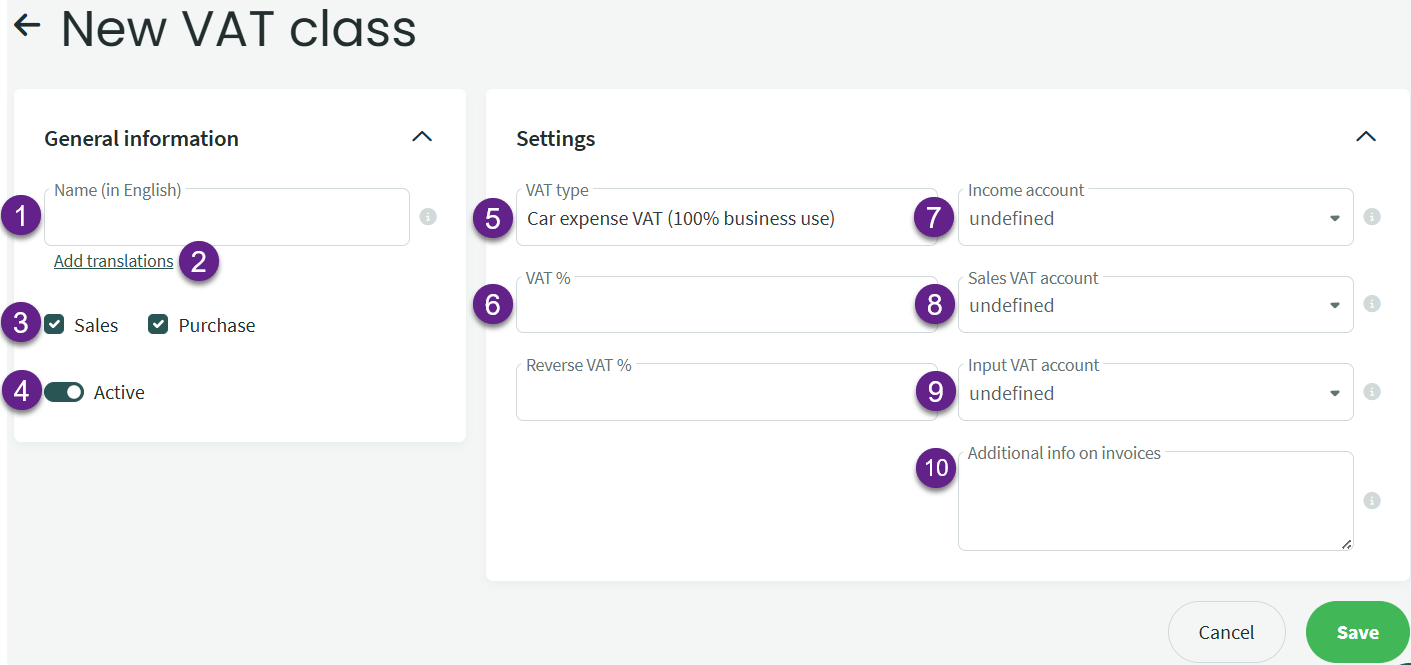
- Name – the name of the VAT class as it appears in the document entry views.
- Add translations – by clicking the link, a window will open where you can enter translations for the label in the languages used in the environment (if needed).
- Transaction type – specifies whether the VAT class is used for sales or purchase transactions.
- Active – indicates whether the VAT class is active, visible and usable during document entry.
- VAT type – defines the legal VAT type according to the law, which the system uses to apply specific rules if necessary (for VAT returns).
- VAT % – the VAT rate as a numeric value. Leaving it blank means no rate is assigned.
- Income account – set if the VAT class is related to sales transactions. When assigned, the financial transaction for the invoice will use the specified income account.
- Sales VAT account – if specified, this account is used to record the VAT for the corresponding line item in the sales document. If not specified, the default sales VAT account defined in the automatic entry settings will be used instead.
- Input VAT account – if specified, this account is used to record the VAT for the corresponding line item in the purchase document (e.g. VAT on vehicle expenses, fixed assets). If not specified, the default input VAT account defined in the automatic entry settings will be used instead.
- Additional info on invoices – text entered here will be added to the additional information field of the sales document when this VAT class is assigned to an invoice line.
If you have any additional questions, please write to us at support@simplbooks.ee
Leave A Comment?