
Purchase invoice payments can be sent to the bank via the bank integration or by exporting them from a file. The different options are described below.
Saving the payment bank file
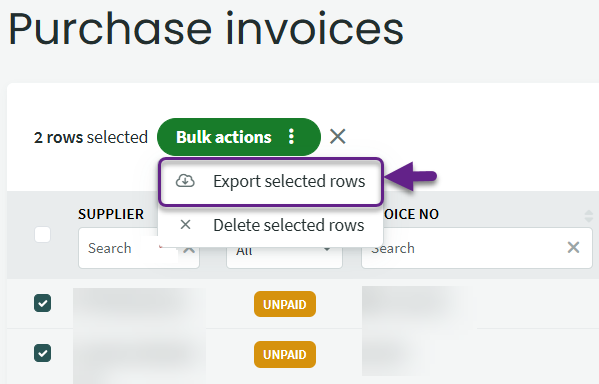
1 To generate a payment bank file go to Operations -> Purchase invoices and select invoices with the status “Unpaid“, “Overdue“.
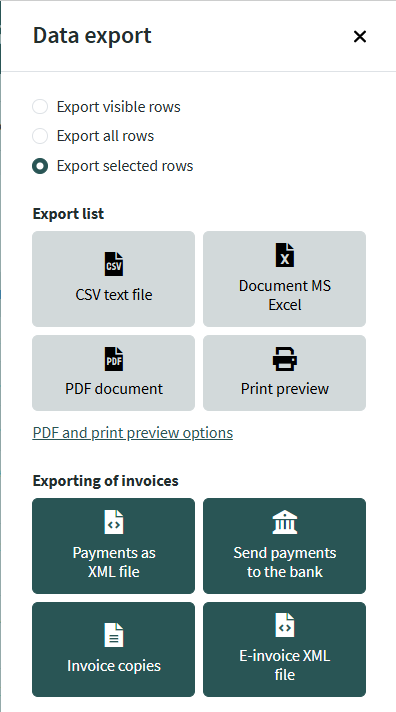
Once the necessary invoices are selected, click on “Bulk actions” and then choose “Export selected rows“.
Once the necessary invoices are selected, click on “Bulk actions” and then choose “Export selected rows“.
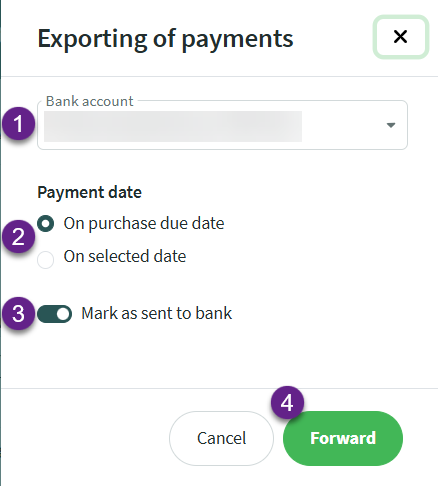
- Bank account selection – if the company has multiple bank accounts, you need to choose which account the payments will be made from
- Payment date – decide whether the payment date should be based on the invoice due date or if you want to specify a different date. This selection applies to all the invoices that were chosen
- By default, the setting is enabled so that when the payment order is generated, the invoice status is changed to “Pending in bank” to prevent the payment from being mistakenly sent to the bank multiple times
- Forward – to save the payment file
Once the payment file has been saved, log in to your internet bank, import the payment file and confirm the payments.
Sending a single payment to the bank via the bank integration
1 Open the purchase invoice you want to send for payment, select “Send payment to the bank” from the Actions menu.

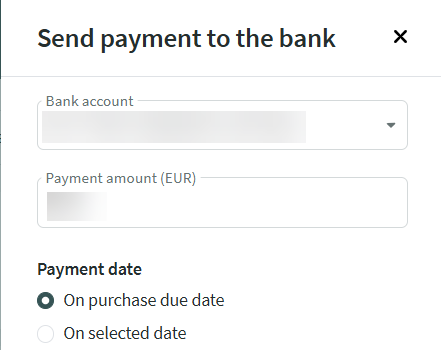
Once the payment has been sent to the bank, the invoice status will change to “Pending in bank” preventing it from being mistakenly sent for payment again.
Important Sent payments must be confirmed in the bank!Sending multiple payments to the bank via the bank integration
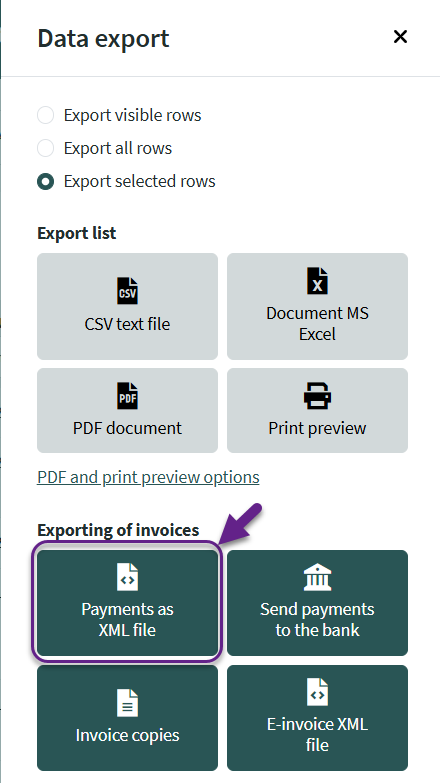
1 Select the invoices with the status “Unpaid” in the purchase invoice list. A “Bulk actions” option will appear at the top of the list. Click on it and select “Export selected rows.“

Once the payments have been sent to the bank, the invoice status changes to “Pending in bank“, preventing them from being mistakenly sent for payment again.
Important The sent payments must be confirmed in the bank!If you have any additional questions, write to us at support@simplbooks.ee
Leave A Comment?