Users groups

User groups are created so that you don’t have to assign different permissions to each user individually; instead, it’s enough to select the appropriate group.

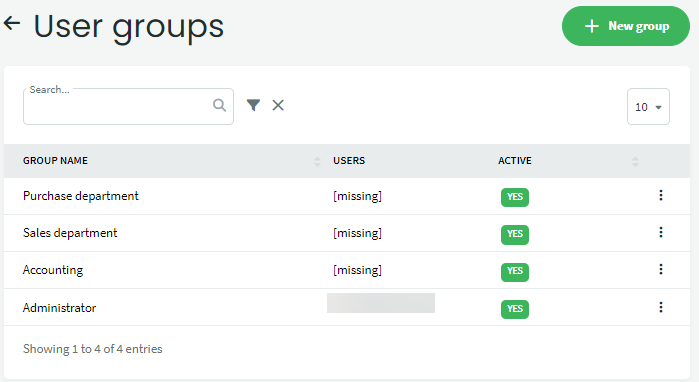
Settings -> Users -> User Groups (from the Actions button)

Preset user groups:

  1. Administrator – a user with full rights in the environment (viewing, editing, deleting)
  2. Accounting – some rights are missing from full access (e.g., adding users, activating, and modifying integrations)
  3. Sales Department – allowed to view, edit, and add only sales-related documents and reports, deleting is not allowed
  4. Purchasing Department – allowed to view, edit, and add only purchase-related documents and reports, deleting is not allowed
Group permissions

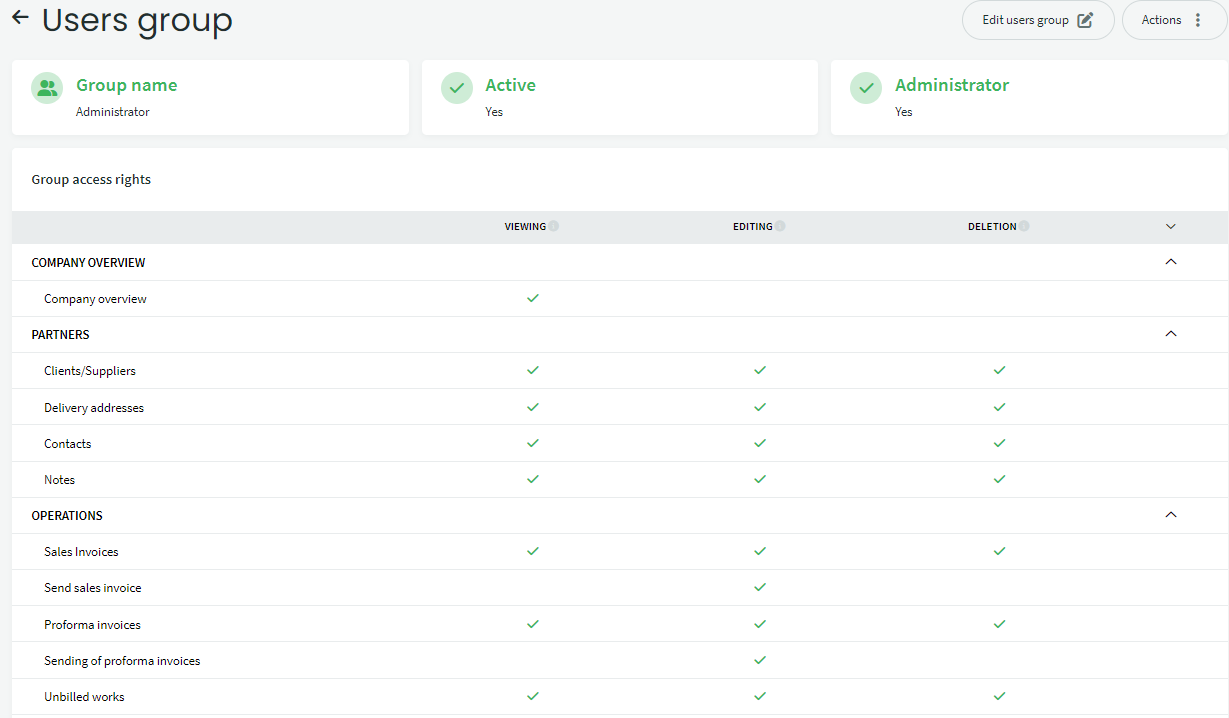
To review the group’s permissions, click on the group name. A permissions overview will now open. If, after reviewing the permissions of different groups, you feel that a suitable group is missing, you can add it by clicking the New group button in the user groups list (in the top right corner).

Permissions are divided into three categories:

  • Viewing – data can be seen but not edited or deleted
  • Editing – data can be viewed, added, and edited, but saved documents cannot be deleted
  • Deleting – requires that viewing and editing are also allowed. The user can also delete entered data.
Group permission settings

To modify or delete user group permissions, click the relevant link in the Actions menu.

If you have clicked on Edit User Group, you can start adding or removing user group permissions.

 to grant permission

 to deny permission

Once the necessary changes have been made, confirm them with the Save button; to cancel the changes, use the Cancel button.

For further questions, write to us at support@simplbooks.ee.

Was this article helpful?

Related Articles

Leave A Comment?