When entering bank transactions, we recommend preferring bank import, either through the bank integraionwhat are bank interfaces? or by doing a file importread how to import from a file.
Why? To reduce the possibility of errors and to speed up work processes.
Note Transactions that cannot be linked to a purchase invoice, sales invoice, or expense report are not saved under receipts and payments. These are recorded as financial entries, except for salary and salary tax payments, which are entered in the payroll module.There are two ways to add receipts: starting from the invoice or from Operations -> Receipts.
Option 1:
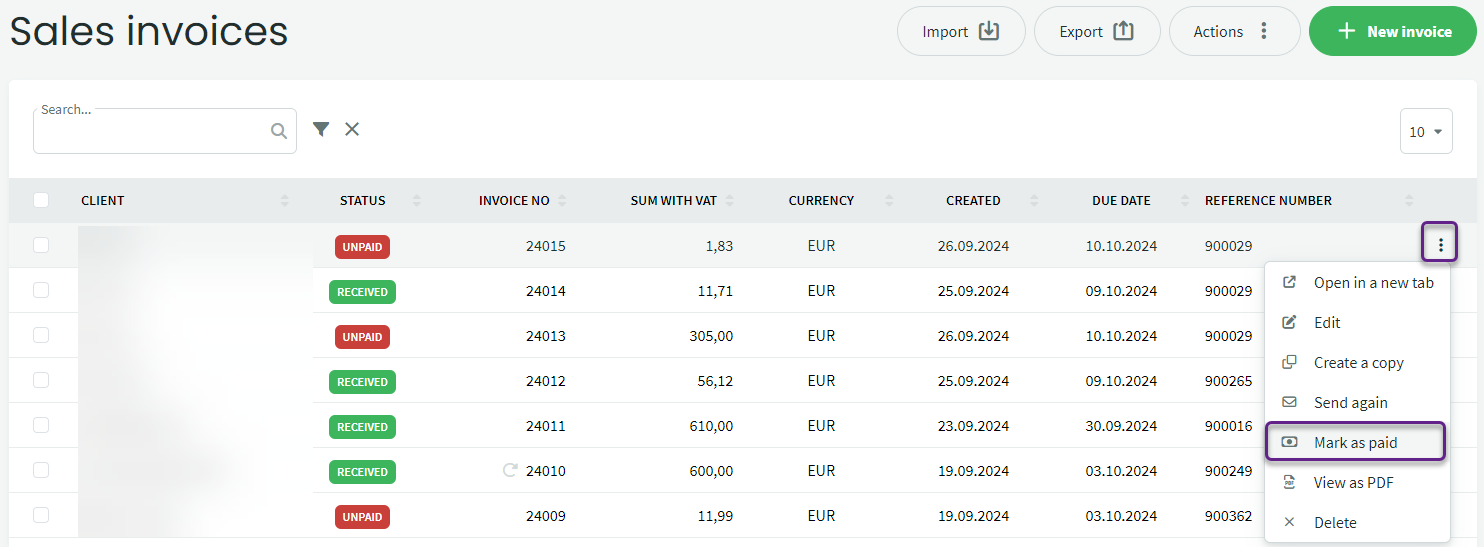
Go to the sales invoices list and find the invoice you want to mark as paid. Click on the three dots at the end of the row and select “Mark as Paid.“
Option 2:
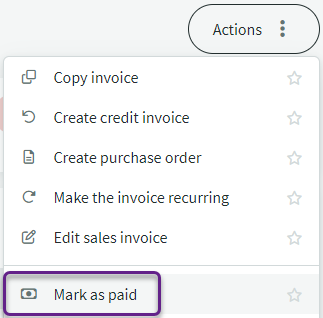
Go to the sales invoices list and find the invoice you want to mark as paid, then click to open the invoice. Here, you have three options (click on the selections to see more):
If the invoice is partially marked as paid, you can use options 1 and 2 to mark the next portion as paid.
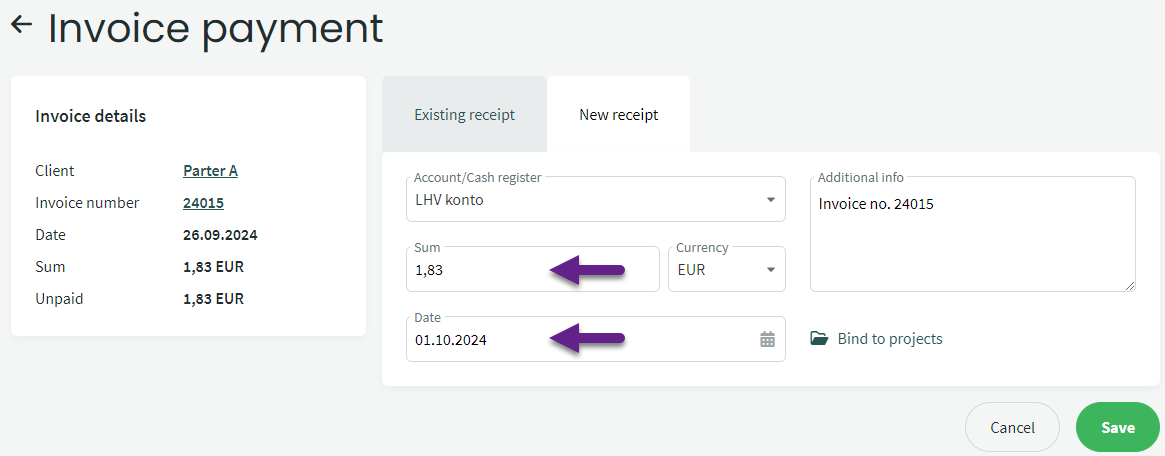
Check the amount and date and save the receipt. If the company has multiple bank accounts, be sure to select the correct one.
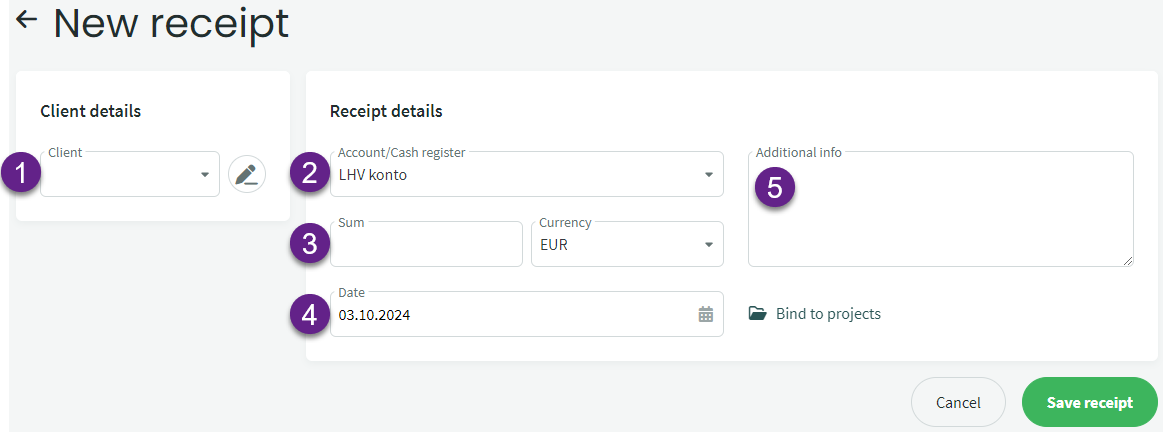
Operations -> Receipts -> New receipt
- Select a client from the existing list or add a new one.
- In the Account/Cash register field, the account set as the default in the settings will be displayed; you can change it if necessary.
- Enter the received sum. If it is a refund for a credit invoice, the amount should be entered as a negative.
- The date is the receipt date (according to the bank statement).
- You can enter the invoice number or information about the advance payment in the additional information field.
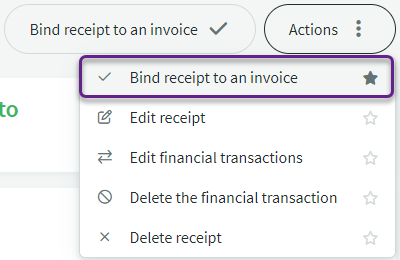
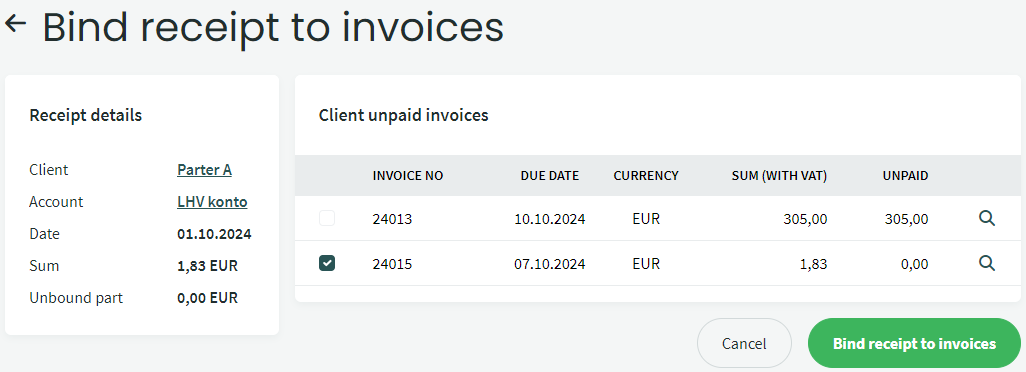
Save the receipt. To link the receipt to the invoice, select Operations menu -> Link Receipt to Invoice.
If the client has multiple outstanding invoices, select the appropriate ones from the list and click “Link Receipt to Invoices.“
If a receipt is in the list with a “Pending” status, it indicates that the receipt is partially or fully unlinked from the invoice(s).
If the receipt is completely unlinked from the invoice, the entire receipt amount is reflected in the customer advance payments account. If the receipt is partially unlinked, the unlinked portion is reflected in the advance payments account.
If the receipt is linked to an invoice with a date later than the receipt date, the system will create an additional financial entry to offset the customer advance payments account against the customer payable account.
If the receipt date is the same as or later than the invoice date, the financial entry for the receipt will be modified, and the customer advance payments account will be replaced with the customer payable account.
Adding payments is largely analogous to receipts.
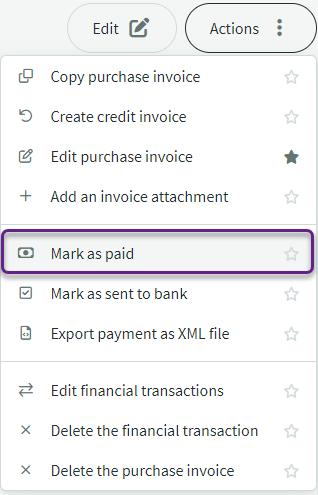
Go to the purchase invoices list, find the necessary purchase invoice, and click to open it.
If the invoice is partially marked as paid, the option to add the next payment will only be available from the Actions menu.
Operations -> Payments -> New payment
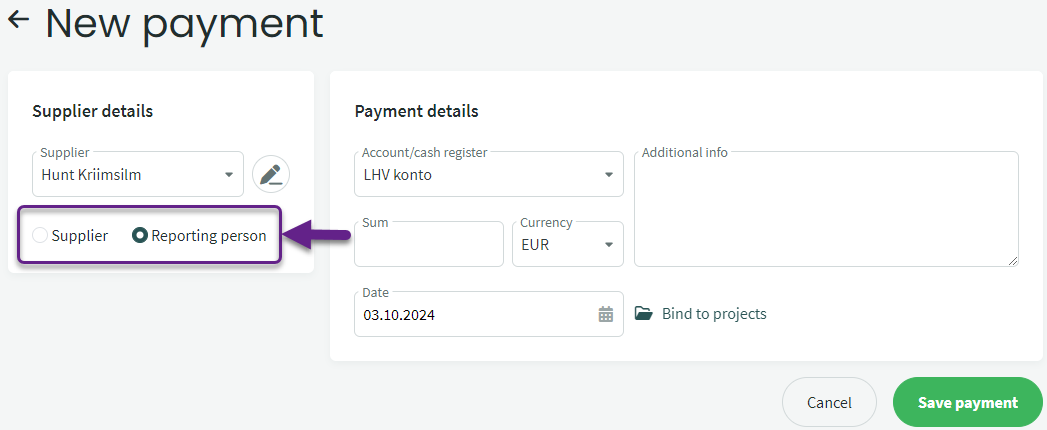
The process for entering payments and linking them to invoices follows the same logic as for receipts. The difference arises when selecting an individual/reporting person as the supplier; the details of the added person will be displayed. In the payment view, there will be an additional option for “Payment Recipient Type.”
If you have purchased goods from an individual under a purchase-sale agreement, they will be your “Supplier.” You enter the contract under purchase invoices and can link it to the payment.
If it is an employee of the company to whom you are paying based on an expense report, travel report, or mileage log, you must select “Reporting Person.“
If a payment is in the list with a “Pending” status, it indicates that the payment is partially or fully unlinked from the invoice(s).
If the payment is completely unlinked from the invoice, the entire payment amount is reflected in the advance payments account. If the payment is partially unlinked, the unlinked portion is reflected in the advance payments account.
If the payment is linked to an invoice with a date later than the payment date, the system will create an additional financial entry to offset the advance payments account against the payable account to suppliers.
If the payment date is the same as or later than the invoice date, the financial entry for the payment will be modified, and the advance payments account will be replaced with the payable account to suppliers.
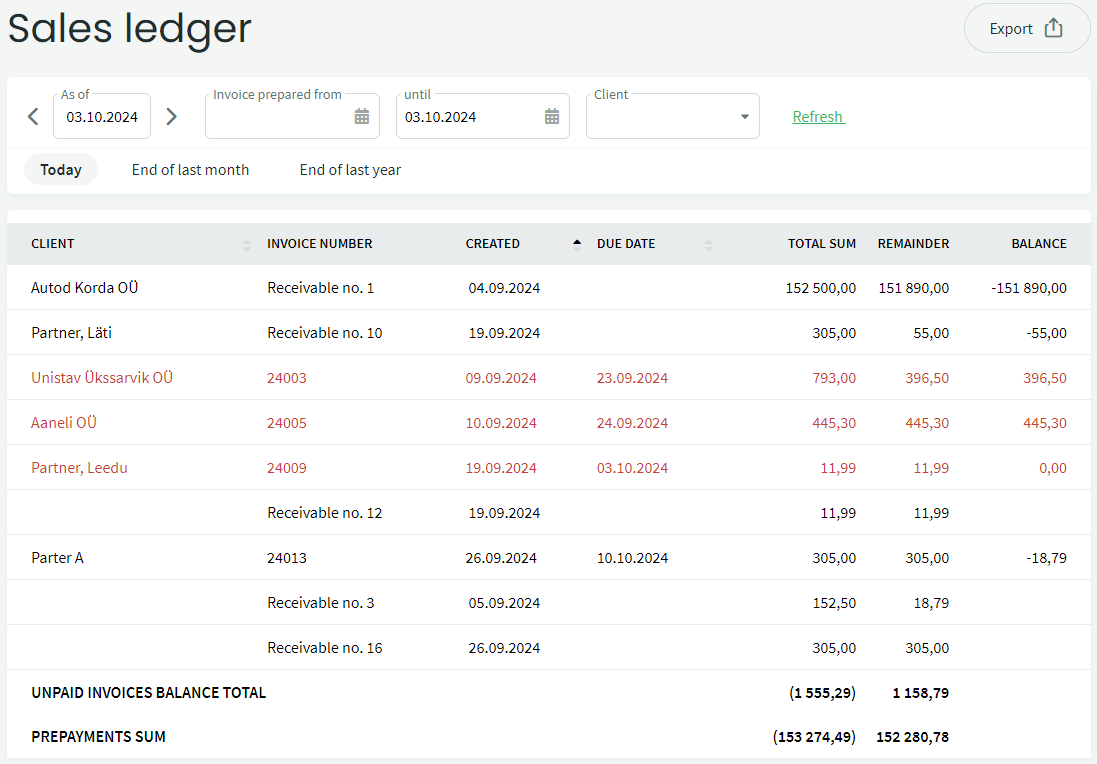
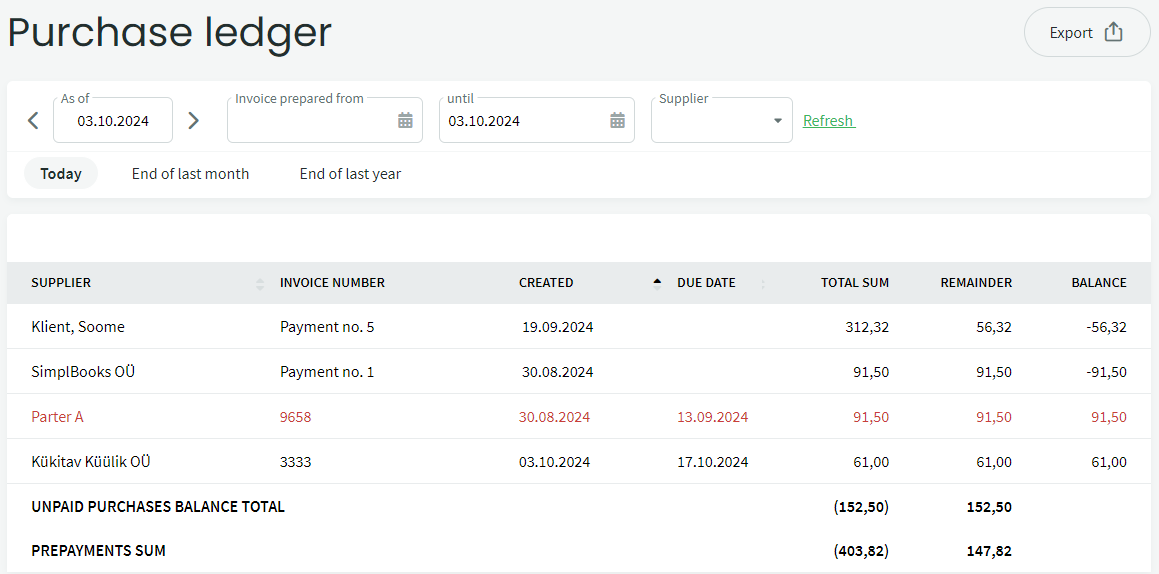
You can view supplier-related debts and advances under Reports -> Purchase Ledger.
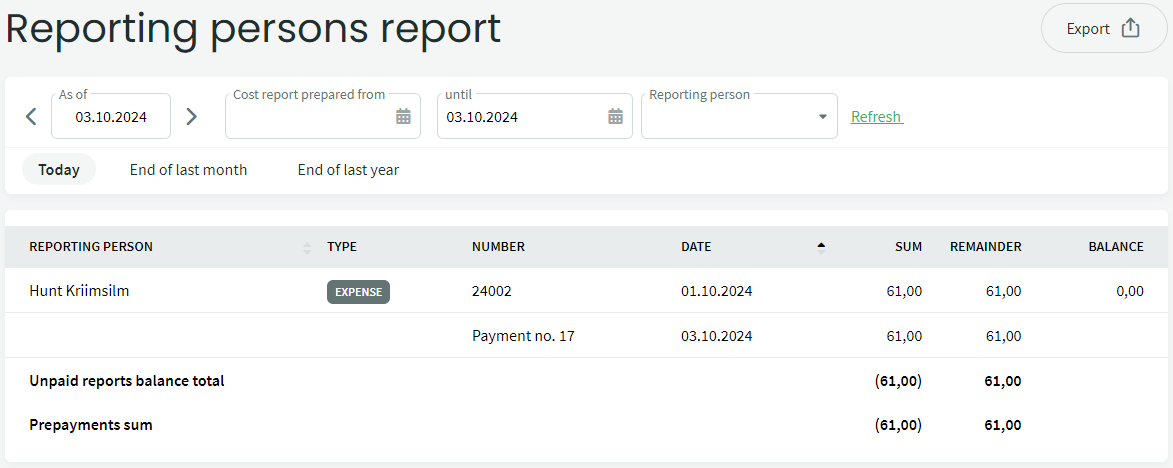
You can view debts and advances related to reporting persons under Reports -> Reporting Persons.
The reports also display the total amounts of invoices and payments, as well as the outstanding balance or advance payment.
For additional questions, please write to us at support@simplbooks.ee





Leave A Comment?