
Fixed assets acquired during the use of SimplBooks should be recorded via a purchase invoice. An exception applies in cases where the cost of a single fixed asset is formed based on multiple purchase invoices. In such cases, it may be more appropriate to create a separate fixed asset card.
● Fixed assets acquired before joining SimplBooks can be recorded according to the guide: How to Transfer Existing Fixed Assets to SimplBooks?The depreciation settings (e.g. when depreciation starts and how frequently expense entries are generated) can be configured under Settings -> Environment Settings -> Fixed Asset Settings.
These settings should be reviewed before entering the purchase invoice for the fixed asset.
When entering a fixed asset purchase invoice, select an account from the 18xx series on the invoice line. These accounts are used for tangible fixed assets in SimplBooks. Accumulated depreciation accounts for fixed assets are in the 185x series. Expense accounts for depreciation are in the 57xx series.
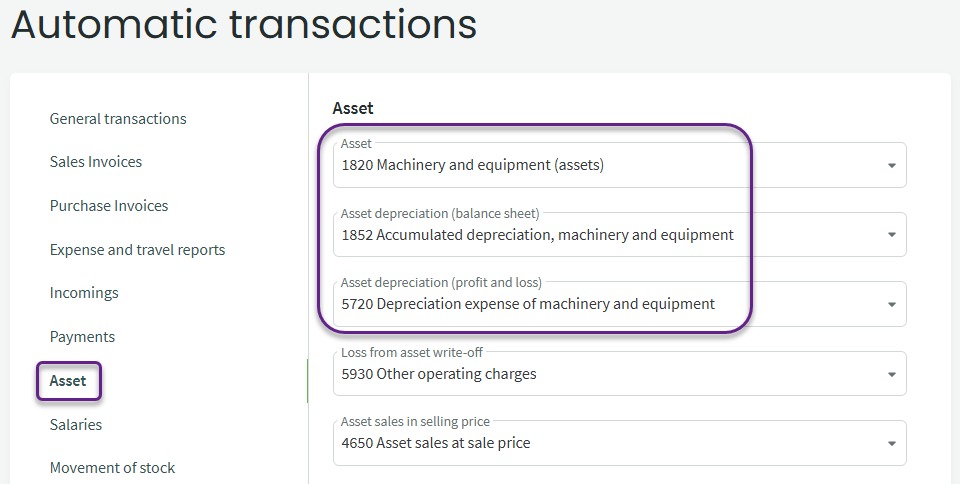
In Settings -> Automatic Entries -> Fixed Assets, you can define the main accounts used for fixed assets in the company. These settings are primarily used to assign depreciation accounts on the fixed asset card.
To enter a purchase invoice, go to Transactions -> Purchase invoices -> New purchase invoice.
Enter the invoice details as usual. On the invoice line, use a fixed asset account from the 18xx series instead of an expense account.
To find the account, start typing “18” – the system will display all accounts with this prefix, allowing you to select the appropriate account for the purchased fixed asset. You can review these accounts in advance under Accounting -> Accounts.

- Account – select a fixed asset account (18xx series).
- Contents – enter the name of the fixed asset. This name is displayed on the fixed asset card, so describe the asset as precisely as possible.
- VAT type – select 24% Acquisition of fixed assets
- Sum – enter the acquisition cost (excluding VAT)
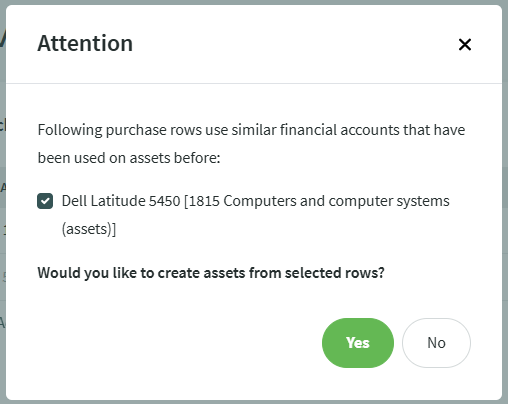
Once all data has been entered, click the “Save purchase invoice” button. The system will automatically offer to create a new fixed asset card when saving the purchase invoice.
Review the data in the modal window once again and confirm the creation of the fixed asset card by clicking “Yes”.
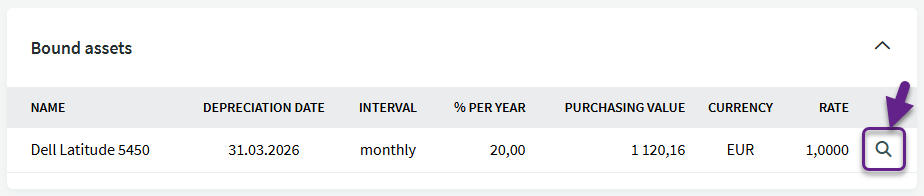
If the creation of the fixed asset card is successful, a “Bound assets” panel will be added to the purchase invoice. At the end of the fixed asset name line, there is a magnifying glass icon. Clicking it opens the fixed asset card view.
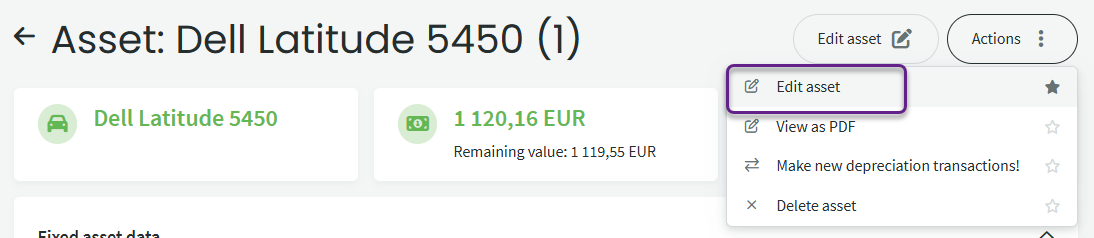
Review the depreciation rate and depreciation accounts, and if necessary, open the fixed asset card for editing. To do this, select “Edit asset” from the “Actions” menu.
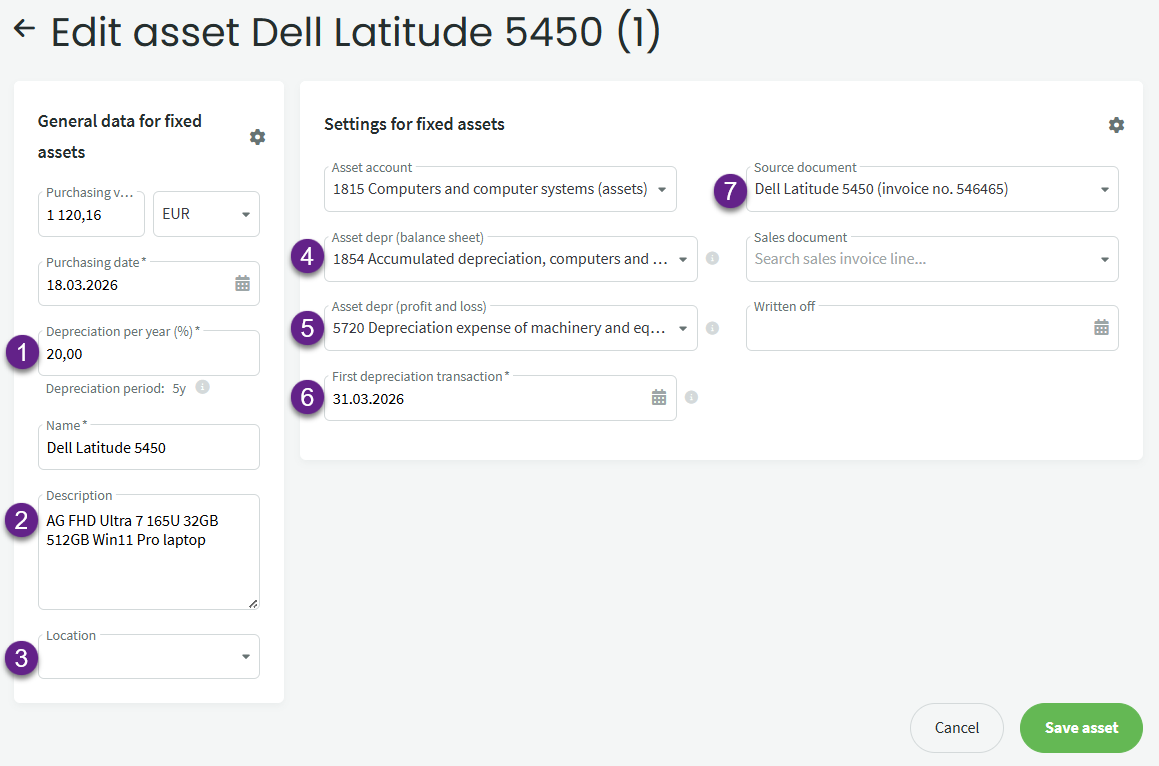
- Depreciation per year – annual depreciation rate, which depends on the asset’s useful life (e.g. if the useful life is 5 years, enter 20%, calculated as 100% / 5 years = 20%).
- Description – additional information about the fixed asset that is not appropriate to include in the name.
- Location – a free text field for entering the location of the fixed asset or the responsible person. This field can also be used to group fixed assets (e.g. “Other machinery and equipment”, “Vehicles”, etc.).
- Asset depreciation (balance sheet) – the account where accumulated depreciation is recorded in the balance sheet. By default, this is the same account as defined in the fixed asset automatic entries settings.
- Asset depreciation (profit and loss statement) – the account where depreciation is recorded in the profit and loss statement. By default, this is the same account as defined in the fixed asset automatic entries settings.
- First depreciation transaction – by default, this is the end of the acquisition month, and depreciation starts from the acquisition date.
- Source document – a reference to the purchase invoice line on which the fixed asset card was created. As long as the fixed asset card is linked to the purchase invoice line, the fixed asset name, value, and acquisition date cannot be changed.
Click the “Save asset” button.
Leave A Comment?