Reverse taxation for external services

Reverse taxation for externally procured services operates similarly to reverse taxation for services and goods procured within the community.

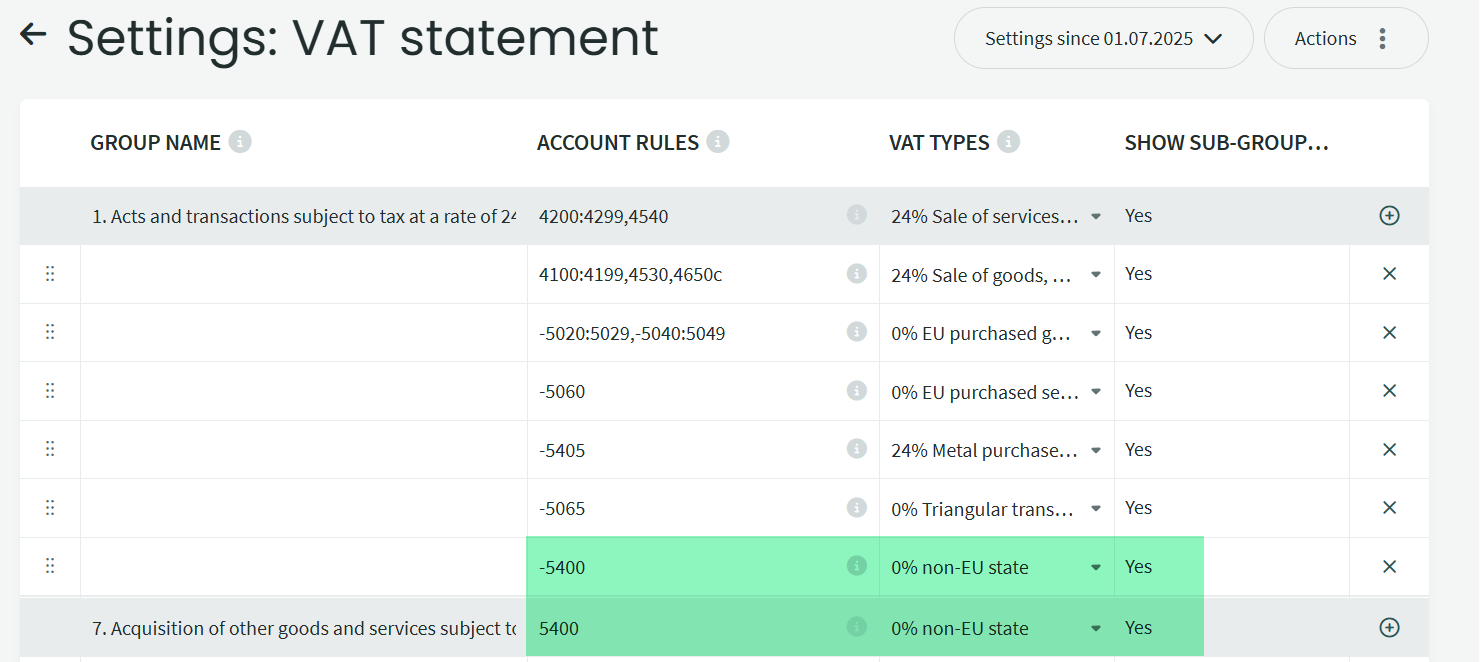
There is no separate VAT type for this in the default settings, but you can add it yourself. You will also need to update the VAT report settings to ensure that the calculations work correctly.

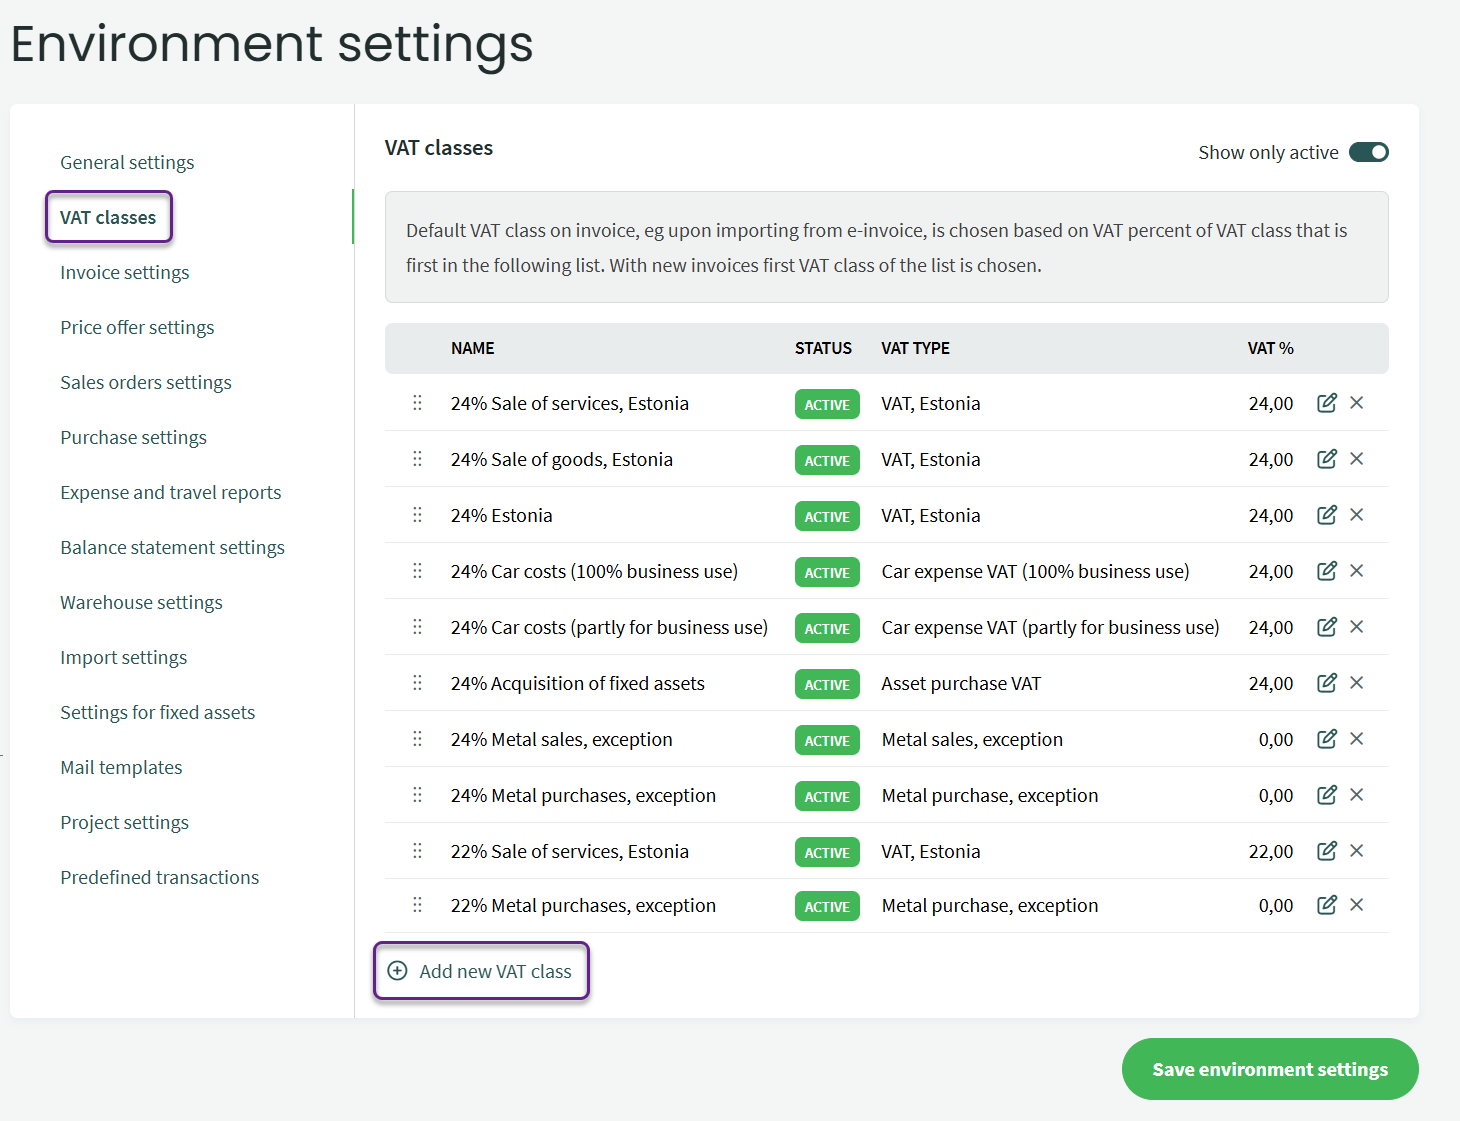
Adding a Separate VAT class

Settings -> Environment Settings -> VAT classes -> Add New VAT class.

Specify the name for the VAT type, leaving “Purchase” selected. It is essential to set the VAT type and mark the VAT percentage as 0.

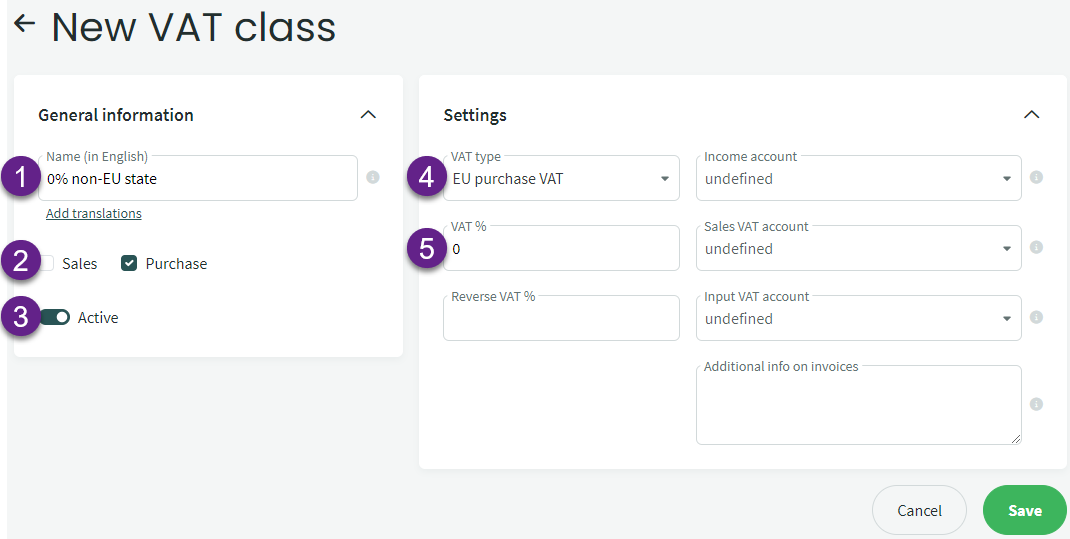
  1. Name – Enter the name for the VAT type here.
  2. Purchase – Remove the selection from “Sales,” as we will only use this type for purchase invoices.
  3. Active – This indicates that the VAT type is active and can be used.
  4. VAT Type – Select “EU purchased VAT” as the type, which informs the program that reverse taxation needs to be applied.
  5. VAT % – Enter 0 here.
Adding Expense Account to VAT Report Settings

Next, you need to select the appropriate expense account. You can use the same expense account that you would use for similar types of expenses for purchases in Estonia, or you can create a separate expense account (expense accounts start with 5xxx; to add an account: Accounting -> Accounts -> New Account). Once the expense account is selected, it needs to be added to the VAT report settings.

Accounting -> VAT Report: From the Actions button, select “View Report Settings.” Under Row 1, add the necessary expense account (with a minus sign) on a new line, and next to it, enter the created VAT type.

You also need to add the mentioned account along with the VAT type to Row 7, but here, there is no need for a minus sign.


When entering a purchase invoice, always use the expense account and VAT type configured in the report settings; this way, the data will flow smoothly into the report. The VAT amount will not be displayed on the invoice or the invoice entry, as this calculation occurs directly in the VAT report.

If desired, you can also add multiple expense accounts to classify costs more precisely.

Adding a Purchase Invoice and Checking the VAT Report

In this example, I will use account 5400 Advertising as the expense account. You can find the list of accounts under Accounting -> Accounts. Now, you need to enter a purchase invoice. For this, go to Operations -> Purchase Invoices -> New Purchase Invoice or Import Purchase Invoice.


On the purchase invoice, select the expense account configured for the report and the VAT type previously added to the VAT field as “0% non EU state”, enter the amount, and save the purchase invoice.

Now let’s check if the data has been correctly transferred to the VAT report. Go to Accounting -> VAT Report and select the appropriate period.

On the VAT report, rows 1 and 7 show the total amount for purchased services, while rows 4 and 5 display the calculated VAT. We have correctly recorded the service amount if the VAT payable and the prepaid VAT are equal.

Guides related to intra-Community reverse charge mechanism can be found here:

Support articles are in Estonian, but if needed, the translation can be made.

Advice If you do not wish to create a separate VAT type, you can also use the “0% EU purchased services” VAT type. However, in this case, you must carefully ensure that the same expense account is not used for intra-Community acquisitions.

For any additional questions, please write to us at support@simplbooks.ee.

Was this article helpful?

Related Articles

Leave A Comment?