
This guide provides information about the fields available in the purchase invoice entry view. A purchase invoice can be entered manually or imported as an e-invoice.
One way to access purchase invoices is to go to Operations -> Purchase invoices. If data has already been entered, you will see a list of purchase invoices here, and you can add a new one by clicking the “New Purchase Invoice” button. If shortcuts are activated in the environment, you can add a new purchase invoice using the keyboard combination Ctrl+P.
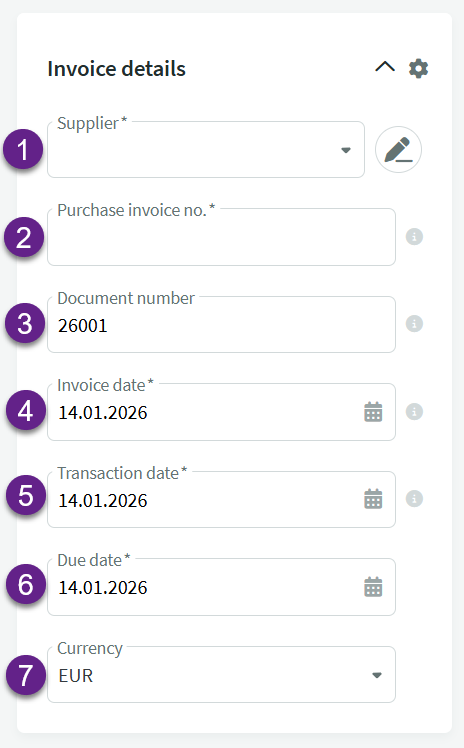 1. Supplier – you can select a supplier already entered into the database or add new supplier details (information about Estonian companies is retrieved from the Commercial Register database).
 In the example shown, we’ve started typing the supplier’s name. The first result is already in the system, the following ones are companies whose data can be imported from the Business Register (indicated by NEW after the name). Select the appropriate supplier by clicking on it.
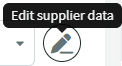 ● In the supplier edit view, you can update supplier details from the Business Register or directly from the supplier card. If the data on the supplier card has changed, a notification will appear at the top of the edit panel.

2. Purchase invoice no – The invoice number indicated on the supplier’s invoice.
3. Document number – A unique number assigned to the document in SimplBooks based on a predefined formula. The document number formula is configurable: Settings -> Environment settings –> Purchase invoice settings. The logic of the number formula is the same as for .
4. Invoice date – The date of invoice issuance as indicated by the supplier on the invoice.
5. Transaction date – The date on which the financial transaction for a purchase invoice is created. Usually, this is the same as the invoice date, but sometimes it is necessary to use a transaction date that differs from the document date. For example, a phone operator’s invoice might be dated 01.02.2026, but the service was used during the period 01.01.–31.01.2026, meaning the expense belongs to January. In this case, the transaction date should be set to 31.01.2026
6. Due date – The payment deadline indicated on the purchase invoice. If desired, you can specify the agreed number of days on the supplier’s card.
7. Currency – It is necessary to select this if the purchase invoice is in a currency other than the euro. The required currency must be activated beforehand in the Settings -> .
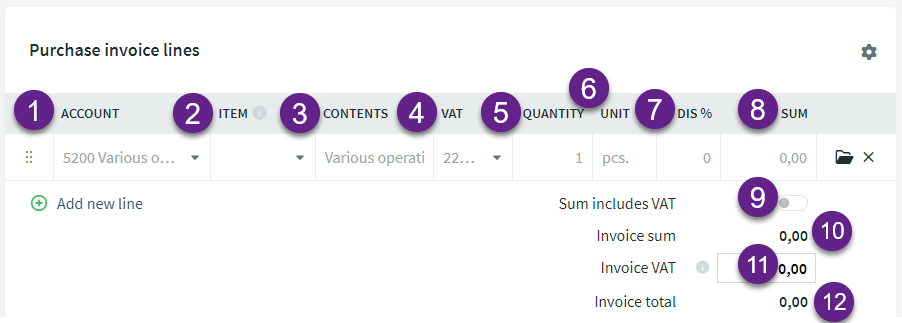
- Account – mandatory field. The default expense account can be set in Settings -> Automatic transactions -> Purchase invoices. The expense account related to the supplier can be specified on the supplier’s card. Accounts can be added and modified in the Accounting -> Accounts.
- Item – optional field. Primarily required for the purchase and sale of warehouse goods. When using items, the “account” field is automatically filled with the inventory account from the item card.
- Content – By default, the account name is displayed here, you can overwrite the content if desired to specify the transaction.
- VAT – selection of the VAT type. By default is selected 24% Estonia. When purchasing services and goods subject to reverse taxation, the appropriate expense account must also be used (see the VAT report) and the suitable VAT type must be selected (read more about them here).
When using the partial VAT type for vehicle expenses, the total VAT amount will be displayed on the purchase invoice. When saving the purchase invoice, an transaction is made such that 50% of the amount goes to the input VAT account for vehicle expenses and the other 50% is added to the expense account line.
If the company is not a VAT taxpayer, the VAT type selection field is inactive. - Quantity – the default quantity is 1, in order for the amount to be calculated correctly.
- Unit – mandatory field. By default it is displayed “pcs” (pieces), but you can overwrite it without using an unit. If you do not wish to specify anything more precise in the unit field, you can enter a dot or a hyphen there, for example. However, since this is internal information for the company, you should not worry too much about it.
- Discount % – the discount percentage, optional field.
- Sum – the total amount of the invoice line, either including VAT or excluding VAT, depending on the selection made.
- Sum includes VAT (Yes/No) – Located before the invoice total amount field. By default, it is selected for amounts to be entered without VAT.
If you want to enter the purchase invoice amount including VAT, you need to activate the button.

- Invoice sum – the sum of the line items.
- Invoice VAT – the total VAT calculated from the line items. Compare it with the amount on the purchase invoice and adjust if necessary (different software may round slightly differently, so there may be minor differences of a few cents depending on the amounts).
- Invoice total – Sum of lines including VAT. Compare it with the total amount on the purchase invoice. If you have adjusted the VAT amount, ensure that the final total is correct. If the final total has changed due to rounding differences, you can adjust the cost account amount or add a separate line using a rounding account (account 5940, with the VAT type “not turnover”).
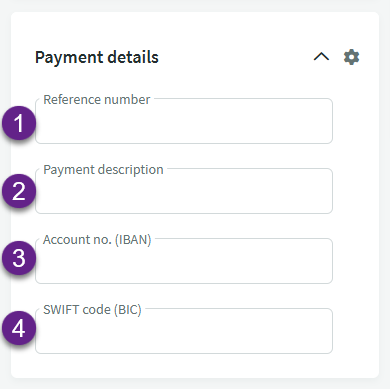
- Reference number – The reference number indicated on the supplier’s invoice
- Payment description – If this field is completed, the information will appear in the payment order’s description field exactly as entered. If left blank, the system will automatically populate the description field with the data from “Invoice details -> Purchase invoice number.”
- Account no. (IBAN) – The supplier’s bank account number
- SWIFT code (BIC) – The supplier’s bank SWIFT code
When making an international payment, banks allow only one field to be filled in — either the reference number or the payment description (invoice number). If a reference number is used, make sure that the “Payment description” field is left empty.
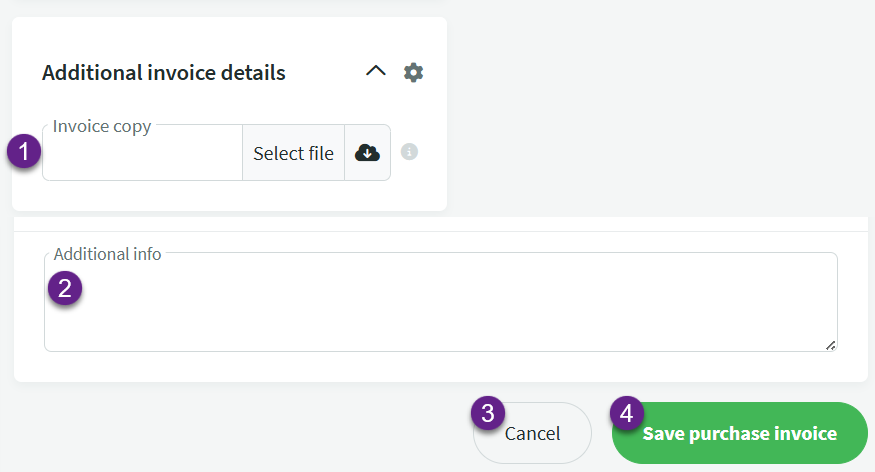
- Invoice copy – optional field, a chance to attach an invoice file to the document. Information on suitable file formats can be found by hovering over the information button. By clicking the “Select file” button, you can attach a file saved on your computer.
By clicking on the “cloud” icon, you can select from the program’s imported but still unprocessed documents (documents imported through CostPocket, sent to the environment’s address). - Additional info – optional field where you can add extra information about the invoice.
- Cancel – to abandon the document entry.
- Save purchase invoice – saves the data of the entered document.
On the purchase invoice, panels can be configured according to your preference: Invoice details, additional invoice details and purchase invoice lines.
In the upper right corner of each panel, there is a gear icon ![]() that opens a similar settings view.
that opens a similar settings view.
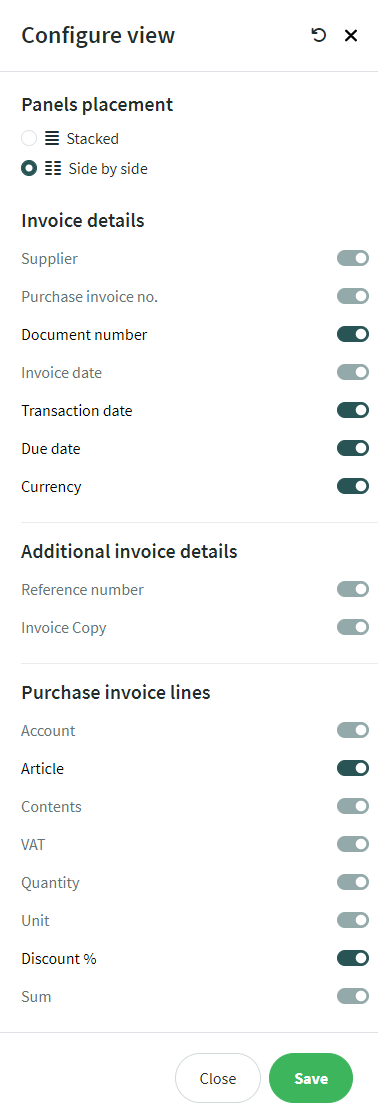
If the button is on a dark green background, it is activated and the line will be displayed in the purchase invoice entry view.
How to create a credit invoice for a purchase invoice can be read in the guide: Creating a credit invoice.
NB! An entry will not be created for the invoice until an opening balance has been entered for at least one account. Also, check the start date for automatic entries (Settings -> Environment settings -> General settings). You can find information about entering opening balances here: Entering initial balances.
If you have any additional questions, please write to us support@simplbooks.ee.
Leave A Comment?