
Transactions can be entered in two ways:
- manually under Accounting -> Transactions
- via bank import
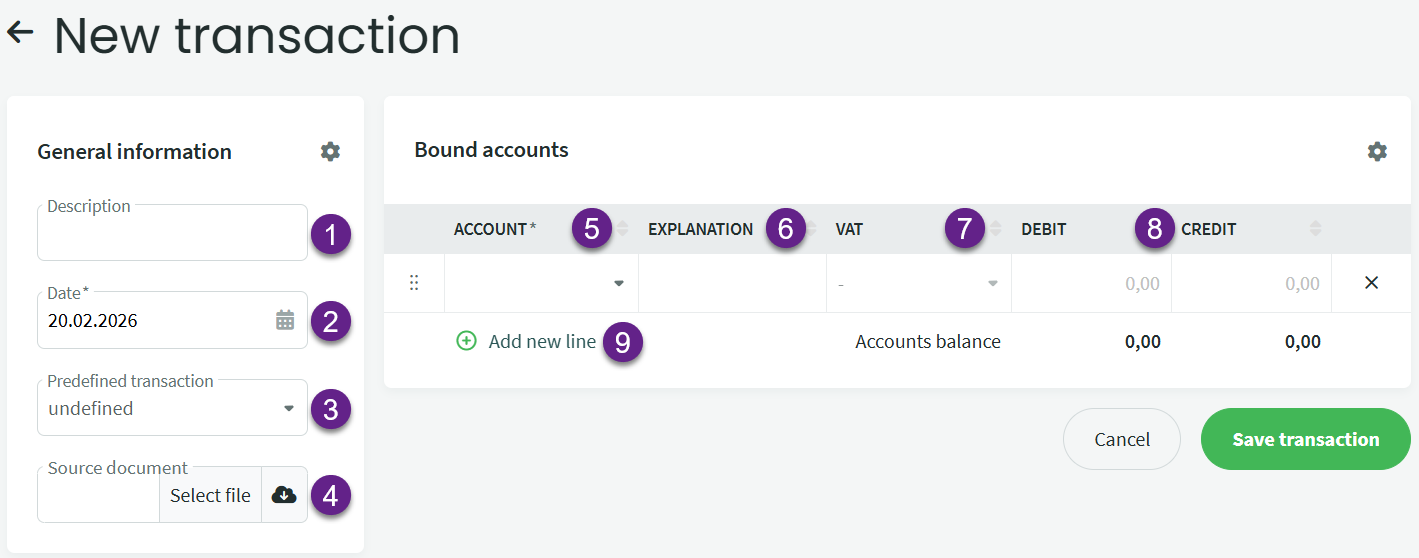
- Description – the description shown in the transaction list.
- Date – the date when the transaction took place (not necessarily the same as the date when the entry is created).
- Predefined transactions allow you to specify the accounts used in an entry and are useful when you frequently need to create entries using the same accounts.
- A source document can be added by uploading a file from your computer (Select file) or selecting one from the imported documents (cloud icon).
- Choose the appropriate account.
- Additional information can be entered in the explanation field.
- The VAT type is filled in automatically for entries created from sales and purchase invoices. Otherwise, it remains empty. If you enter a sales-related entry manually, you must also specify the VAT type; otherwise, the entry will not be included in the VAT statement.
- Debit/Credit amounts.
- Add a new line. Each entry must contain at least two lines.
If bank transactions have been imported but have not yet been processed, you can change the transaction type. The available options depend on whether the bank transaction is incoming or outgoing.
The system generally recognises bank service fee transactions and can immediately suggest the appropriate expense account:
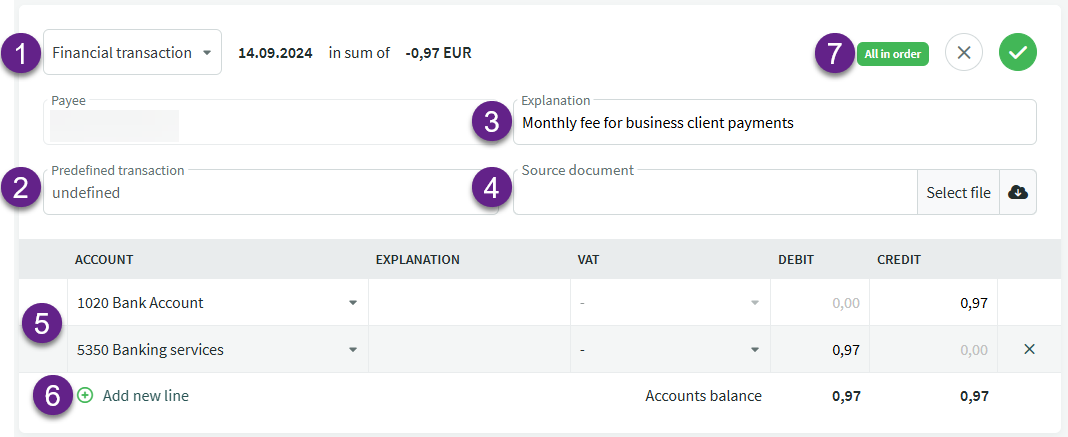
- Transaction type, which can be changed by clicking the arrow.
- Select a predefined transaction.
- The description is filled in automatically with the information received from the bank. When a predefined transaction is used, the bank description is replaced with the description of the predefined transaction.
- A source document can be added by uploading a file from your computer (Select file) or selecting one from the imported documents (cloud icon).
- The first account line is filled in with the bank account information received from the import. This line cannot be changed.
- If necessary, additional lines can be added to split the bank transaction amount between multiple accounts.
The image below shows an example where a transfer to the Estonian Tax and Customs Board (EMTA) is imported with the type “Payment,” but we will change it to the type “Financial Transaction.” Select account 1520 Tax Prepayment as the second account.
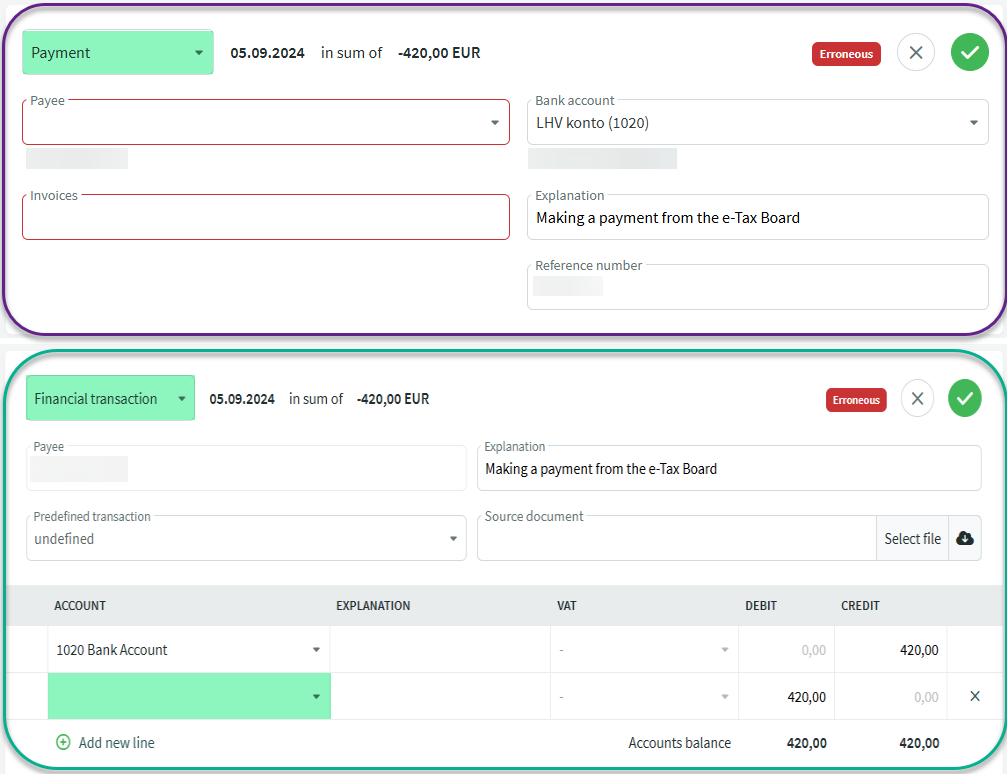
The entry should be saved this way when paying VAT or when fringe benefit taxes are paid separately from payroll taxes.
When paying payroll taxes, you must select the type “Payroll Taxes.”
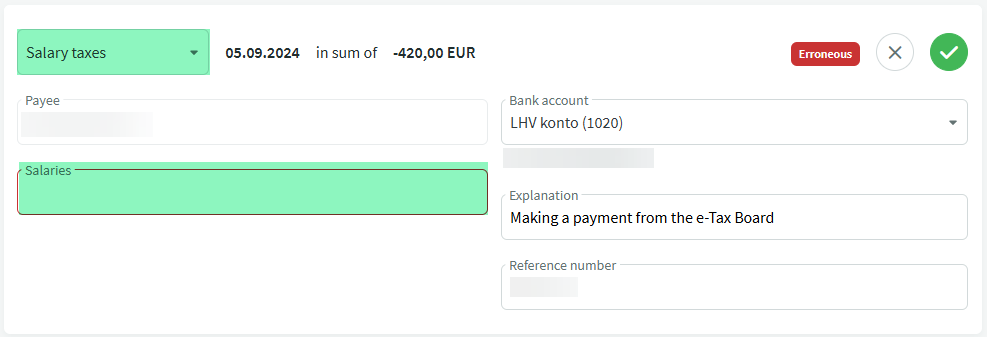
Click the “Salaries” field and select the salaries for which the taxes were paid. Account 1520 Tax Prepayment is used in the entry, and the entry for closing the payroll tax liabilities is saved under the TSD report for the month in which the taxes were paid.
To edit a transaction or create a copy of it, click the relevant entry in the transaction list.
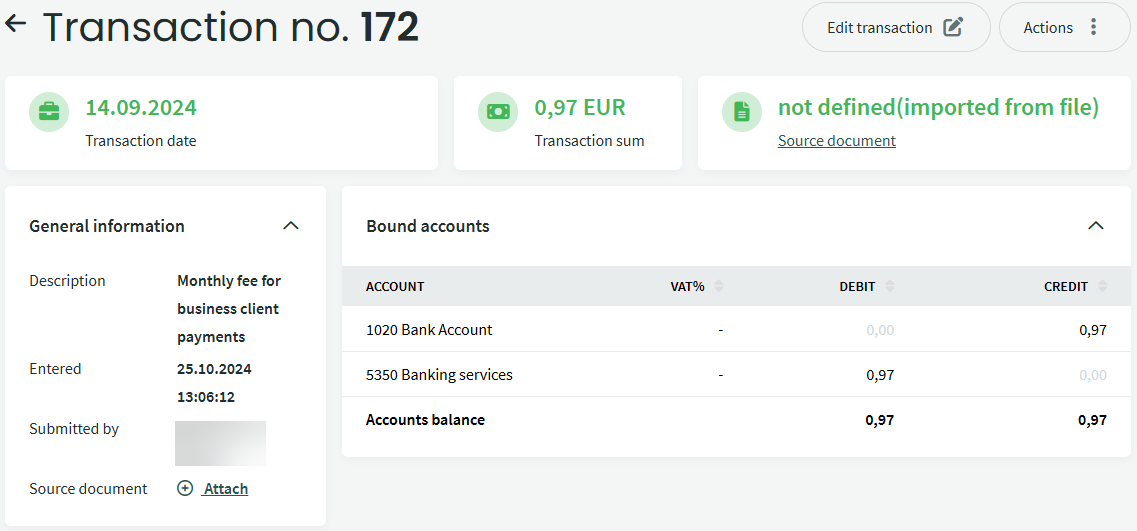
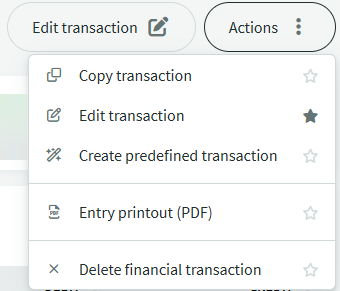
Hover over the Actions menu button to see the available options. You can also mark two of your most frequently used actions as favorites.
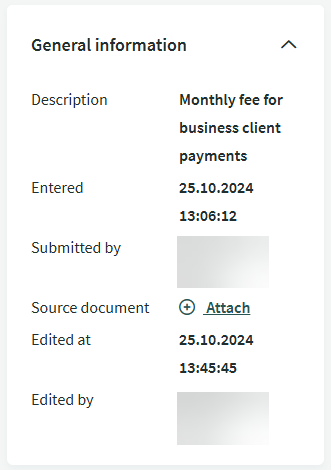
After an entry has been edited, the time of the last change and the user who made the change are displayed under the general information. If an entry has been edited several times, only the information about the most recent change is shown here. More information is available in the user activity history under Settings -> Users -> User Action Log.
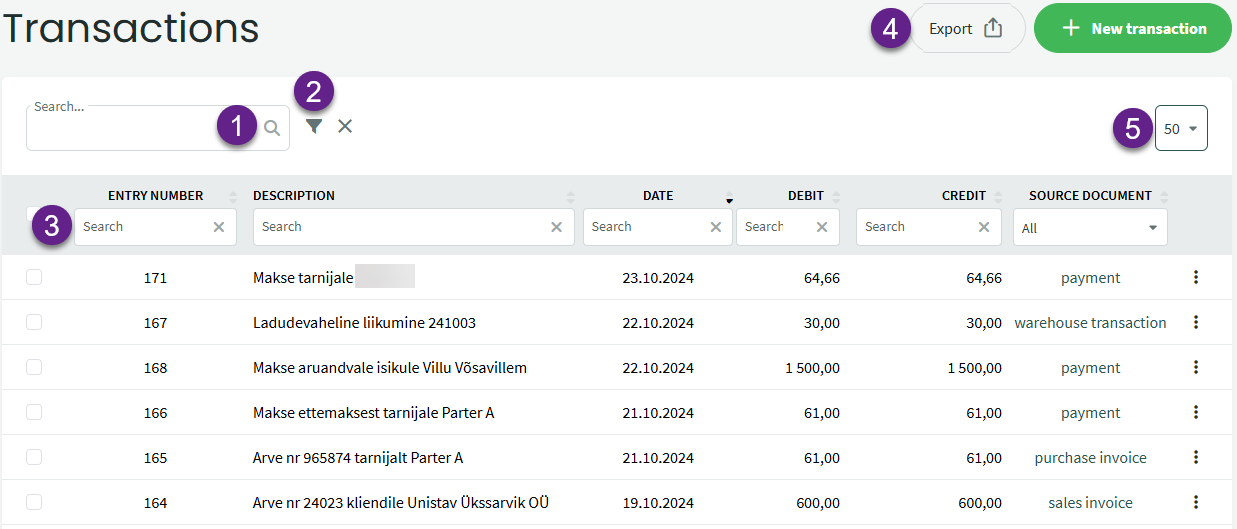
- General search field.
- Advanced search filter and button for clearing all filters.
- When the advanced search filter is activated, search fields are displayed above all columns.
- Options for exporting the transaction list in different formats.
- Change the number of rows displayed in the list.
In the advanced date search field, you can filter as follows:
- Enter the month and year (03.2024) to display entries for the entire month.
- Enter the year (2024) to display entries for the entire year.
- Enter 01.01.2024- to display entries from 01.01.2024 onwards.
- Enter -31.12.2024 to display entries up to 31.12.2024.
The text in the Source Document column indicates which source document the entry was created from. For entries added manually or saved as transactions through bank import, this column displays “MISSING”, indicating that the entry was created separately.
If you delete an entry that has no source document, the deletion is permanent and the entry cannot be restored.
If an entry was created from a source document, the entry itself cannot be deleted. The source document must be deleted instead, after which the system will also delete the related entry.
Examples of different accounting entries can be found in the guide “Frequently used accounting tramsactions“.
If you have any additional questions, write to us at support@simplbooks.ee

Leave A Comment?